Create Zenduty Notification Channel
Prerequisites
Application Program Interface (API) integration key from Zenduty
Get Zenduty API key

Login into your Zenduty account.
Go to the Teams (1) Section.
Select a Team (2).
In the Team (1) window, go to the Services (2) section.
In the Services (2) section, select a Service (3).
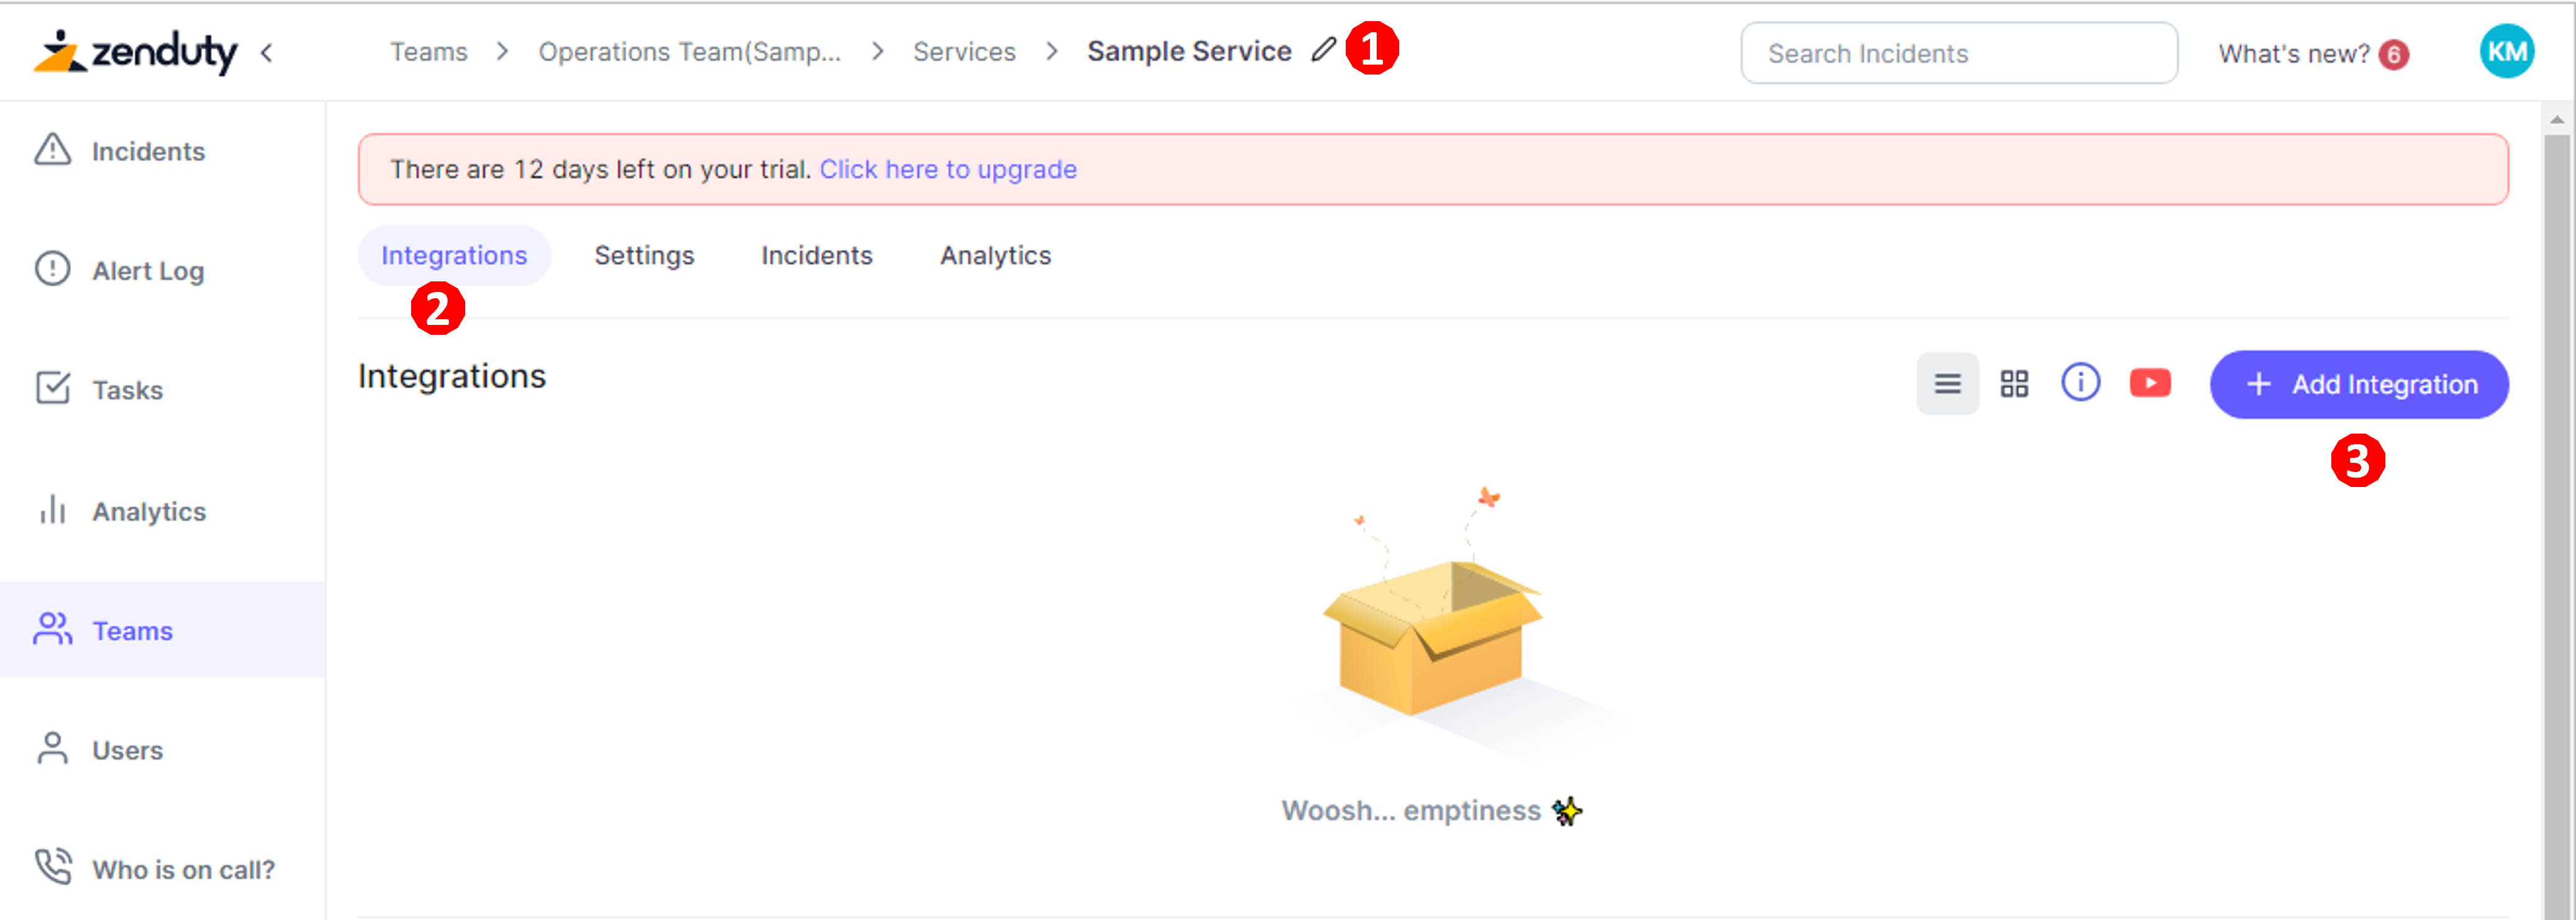
In the Service window (1), go to the Integration (2) tab.
Click the
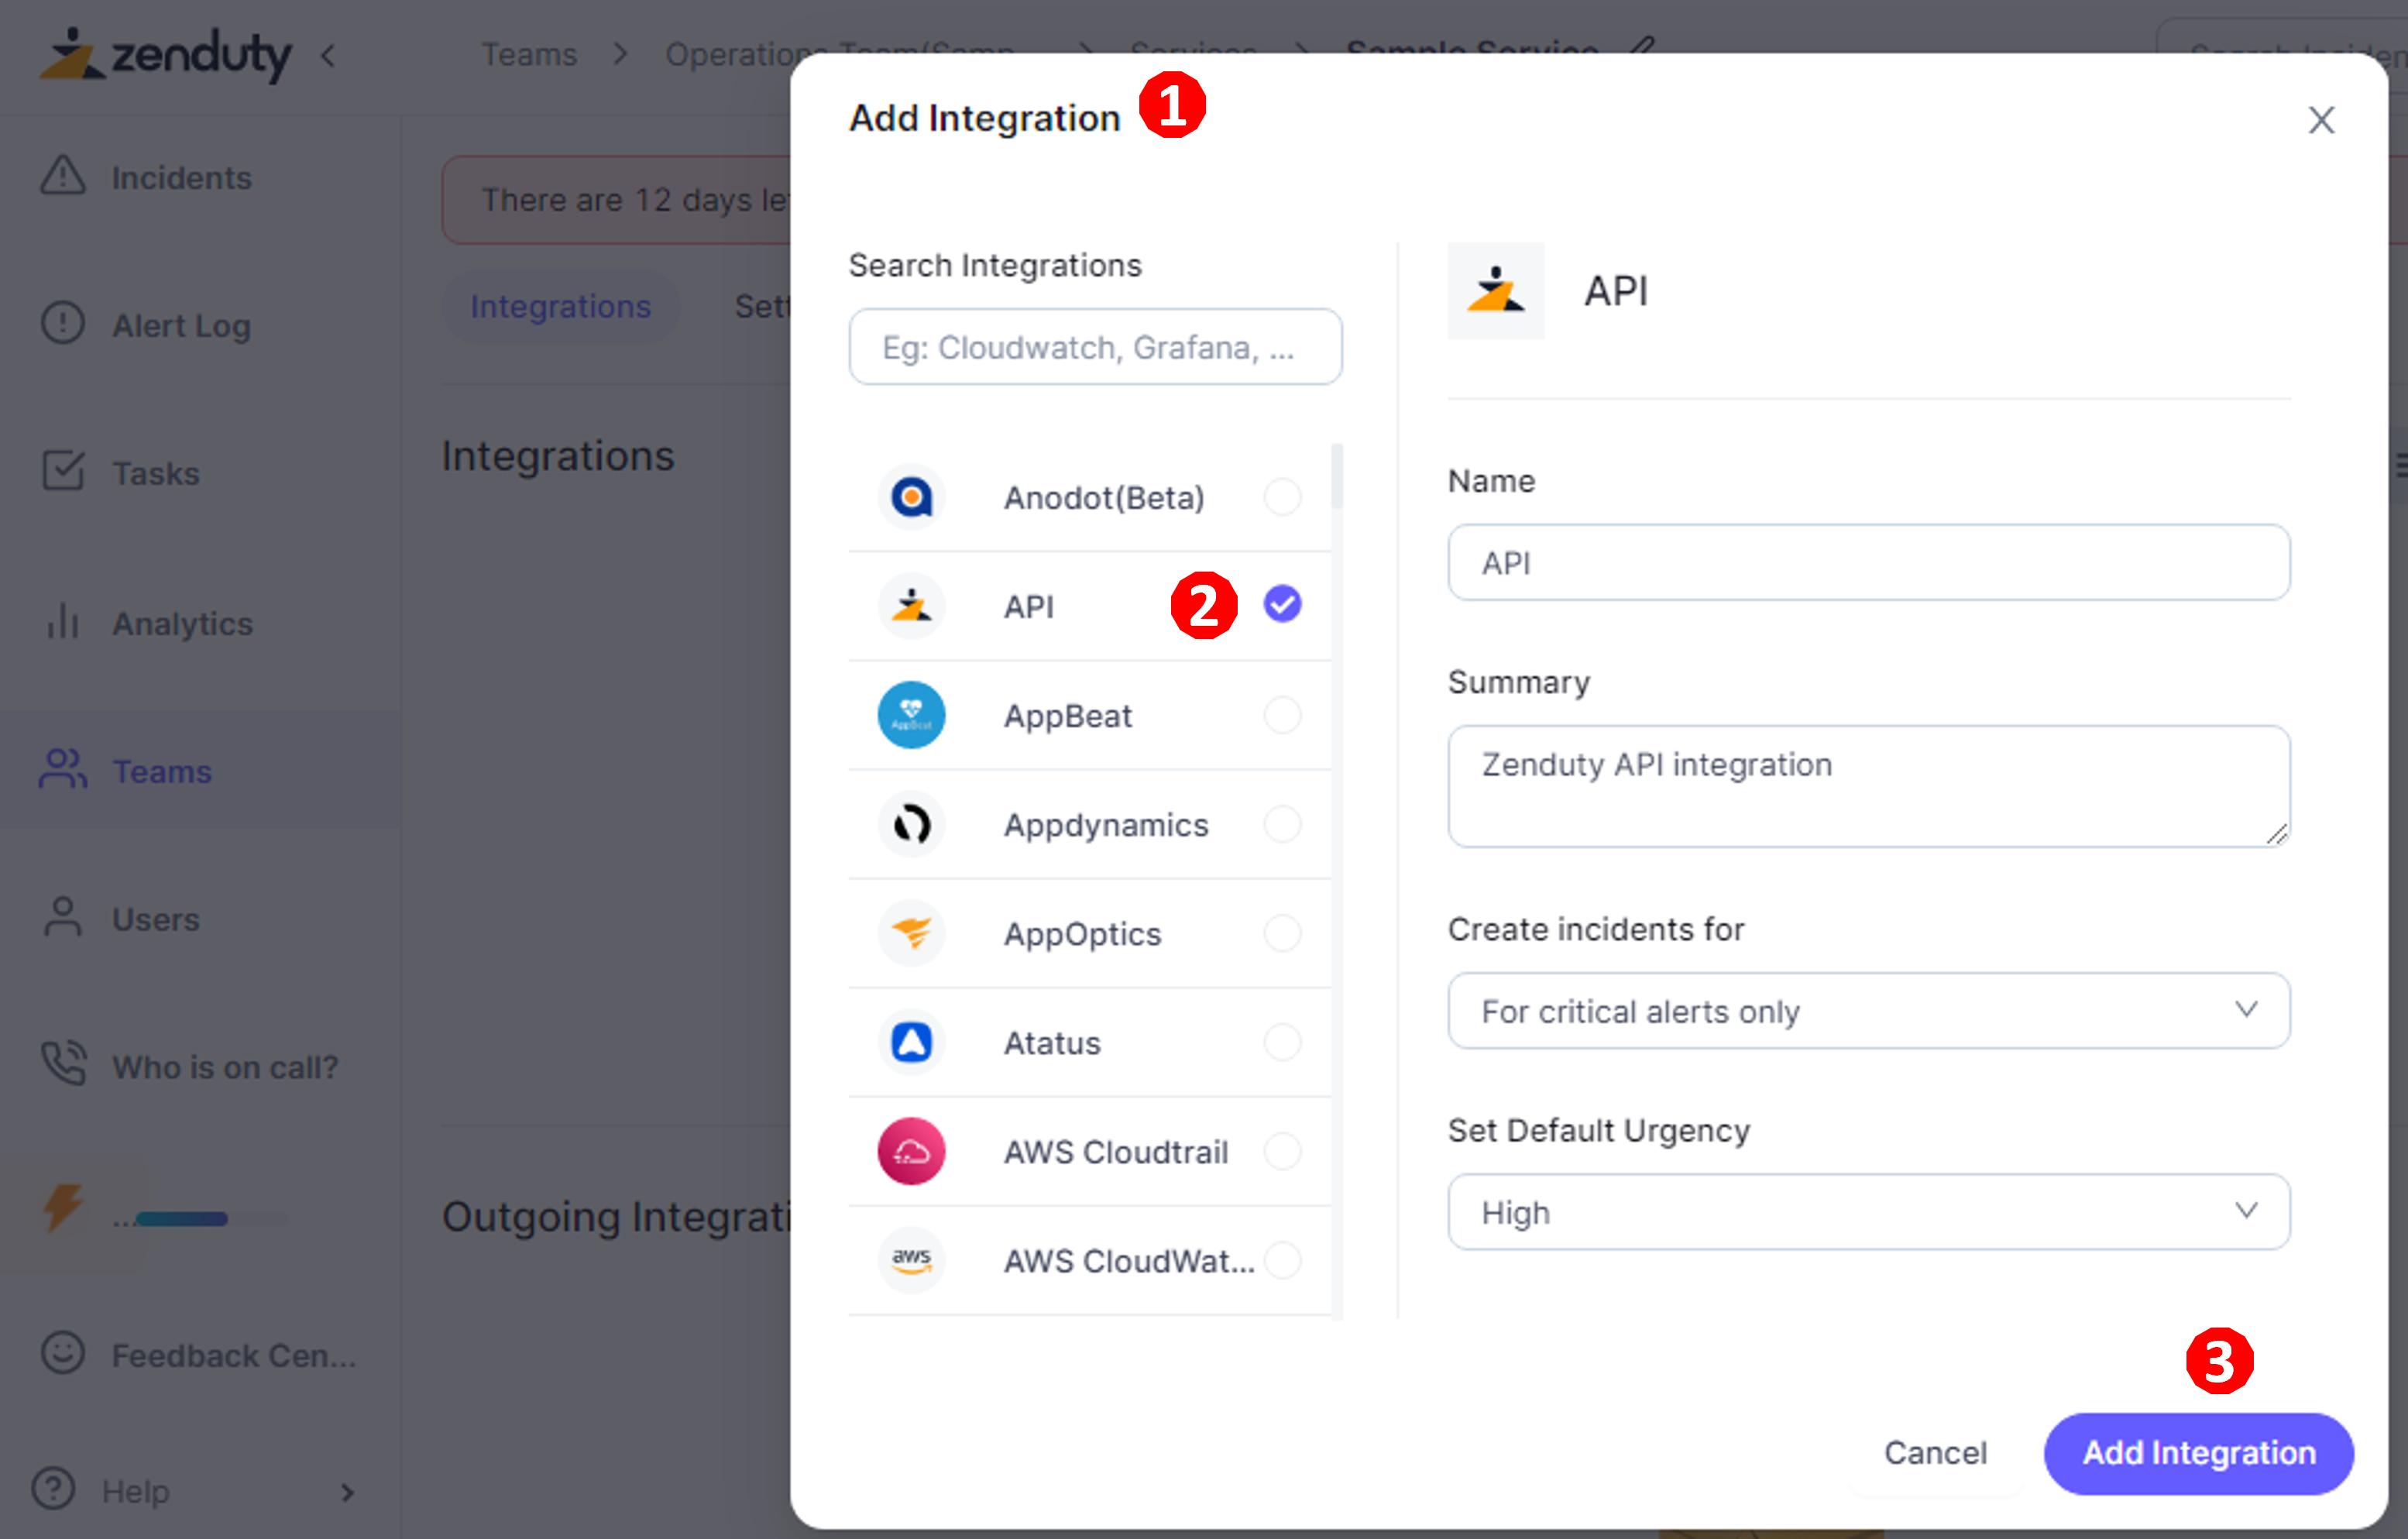
+ Add Integration(3) button.In the Add Integration (1) window, select API (2) as the integration type.
Click the
Add Integration(3) button.Copy the Integration Key generated.
Create a Zenduty Notification Channel in SnappyFlow

Go to the Manage (1) tab.
Click the
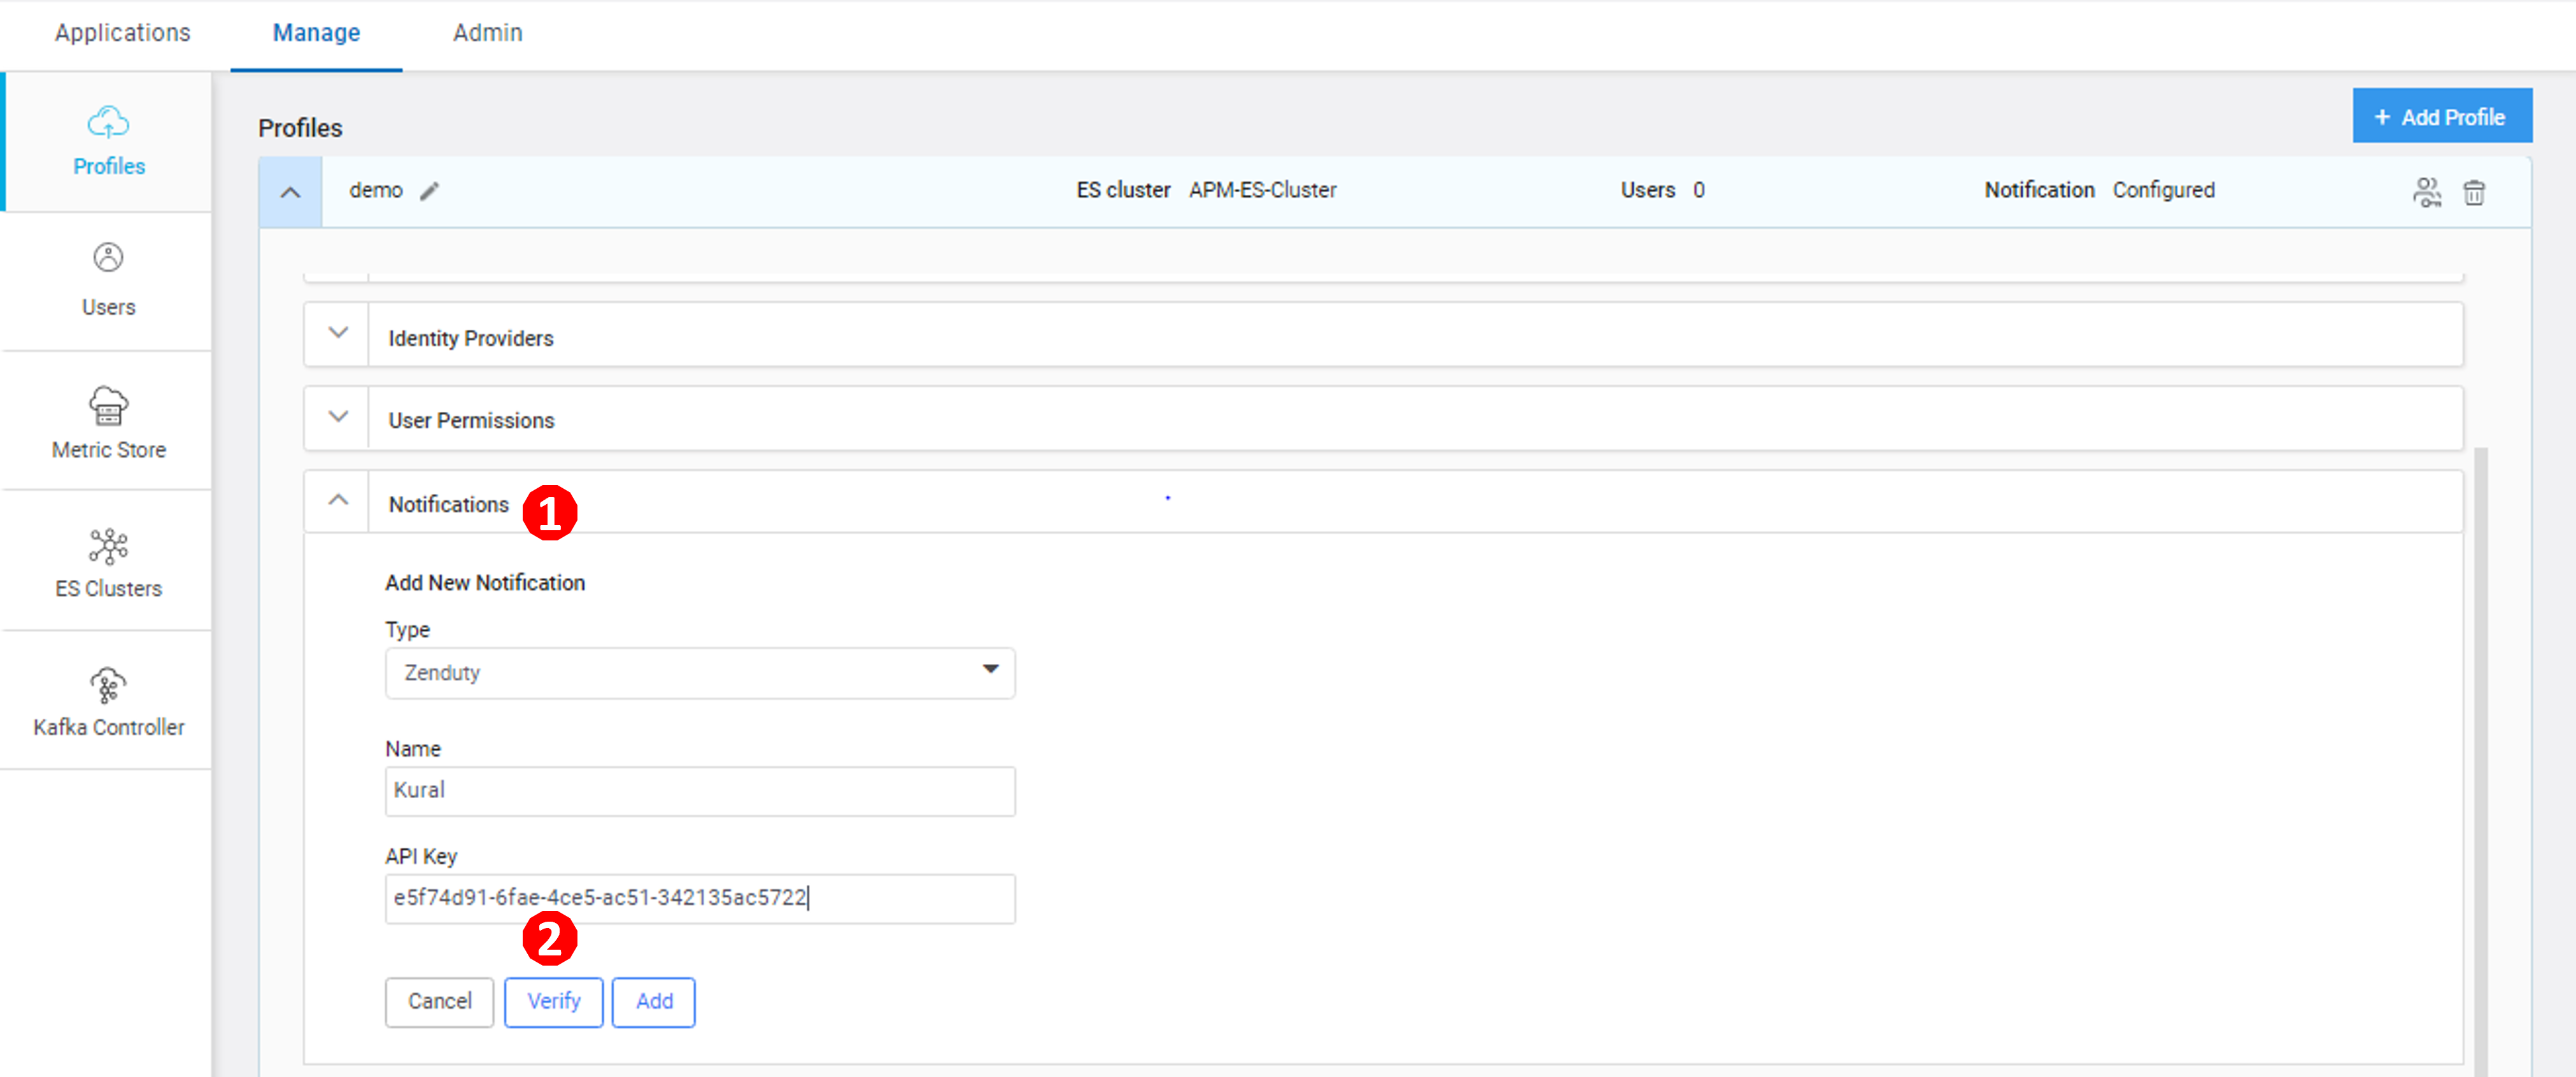
down arrow(2) icon near your profile.Go to the Notification (1) section.
Enter the required details.
- Type - Click the drop-down icon and select
Zenduty - Name - Type a UserName
- API Key - Enter the API key generated in your Zenduty account
- Type - Click the drop-down icon and select
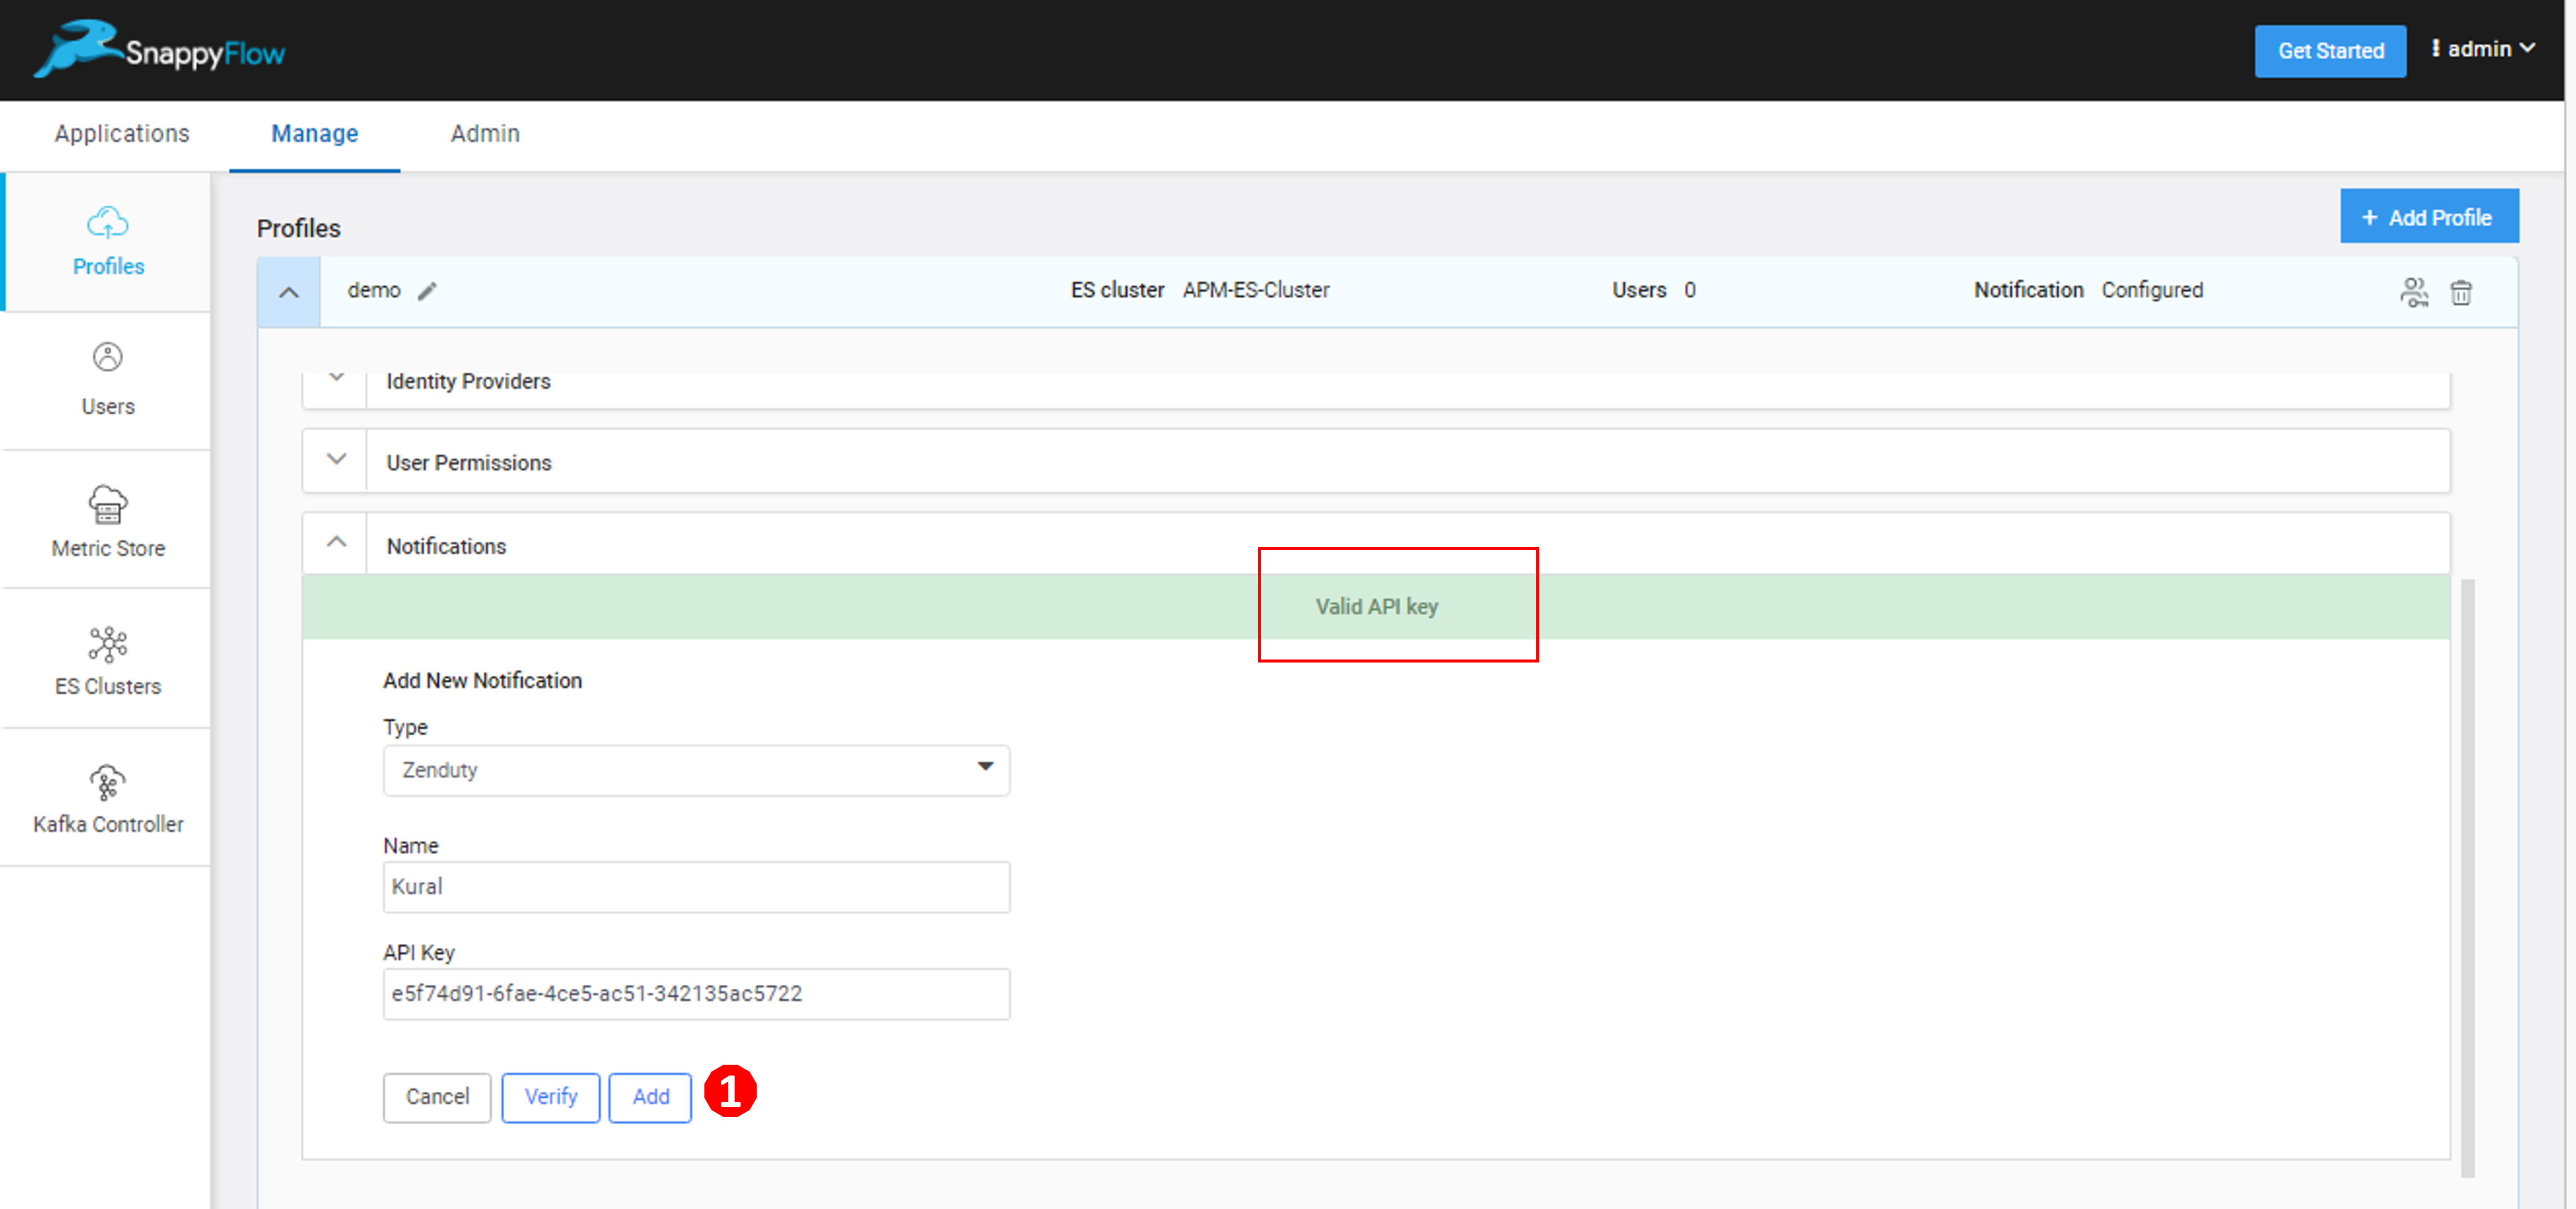
Click the
Verify(2) button.valid API Keymessage will be generated if the API key is valid.Click the
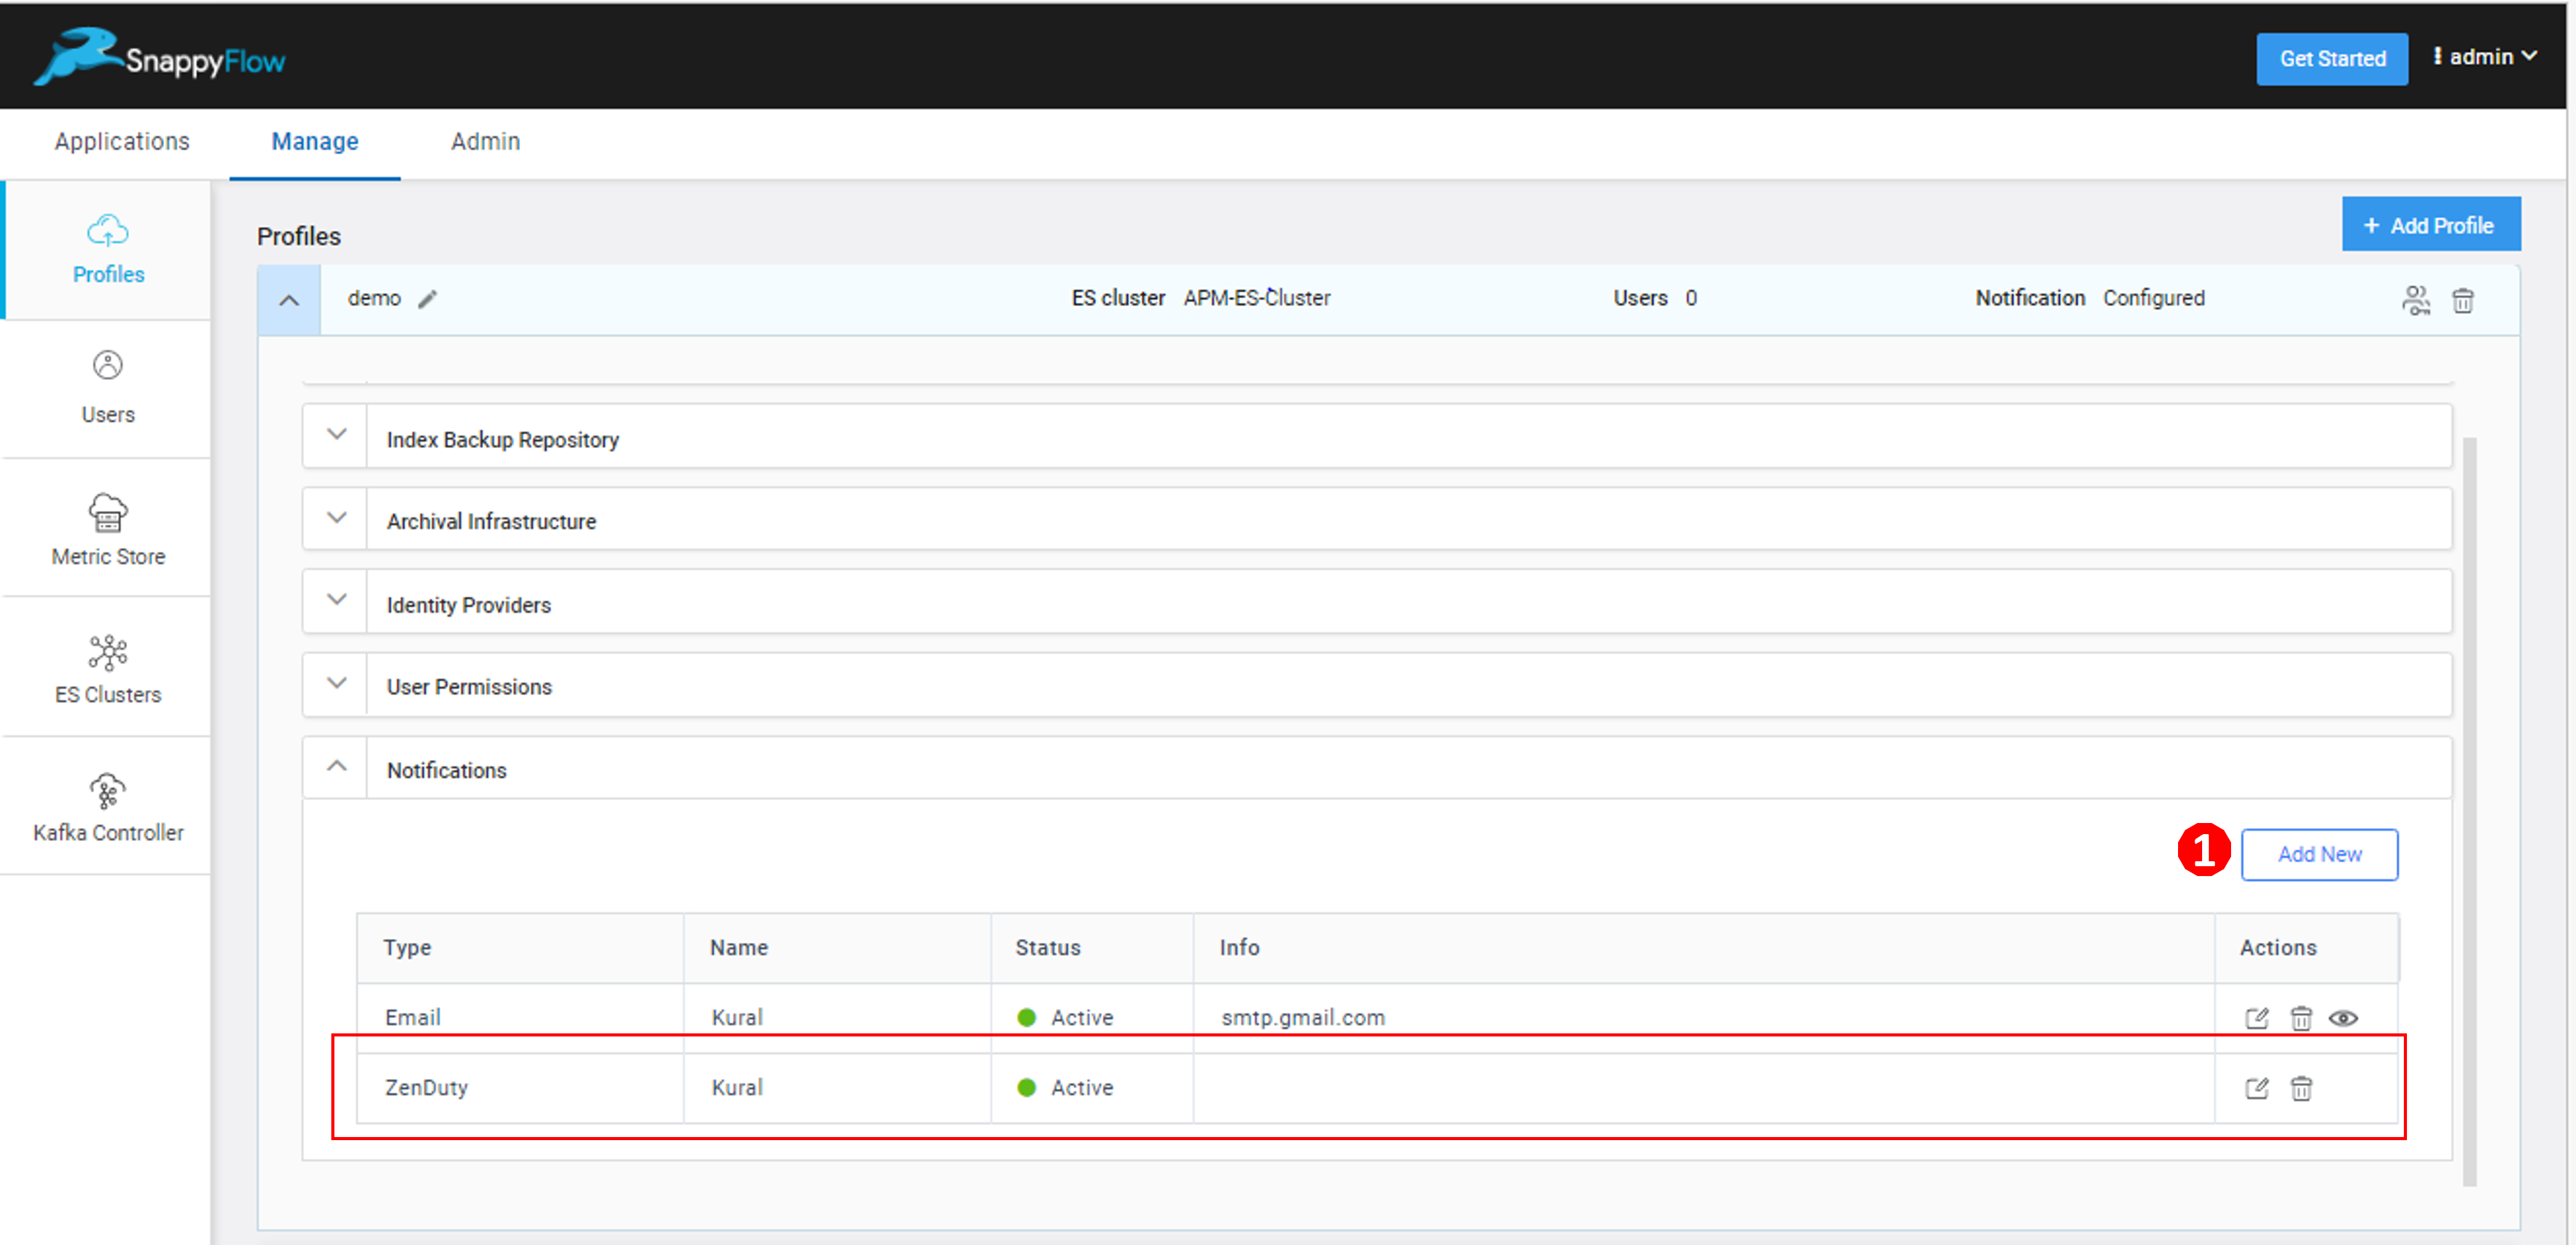
Add(1) button.The table with user details will be auto-generated as shown in the above image. The table has the following details:
- Type - Notification type
- Name - Profile Name
- Status - State of integration
- Action - The action column has options to Edit and Delete the profile
Click the
Add new(1) button to create multiple Zenduty notification profiles.You have successfully created a Zenduty notification channel. The next step is to map the notification to your project Click here.

