Create Webhook Notification Channel
Set up a Webhook Notification Channel
Follow the below steps to set up a Webhook notification channel in SnappyFlow.
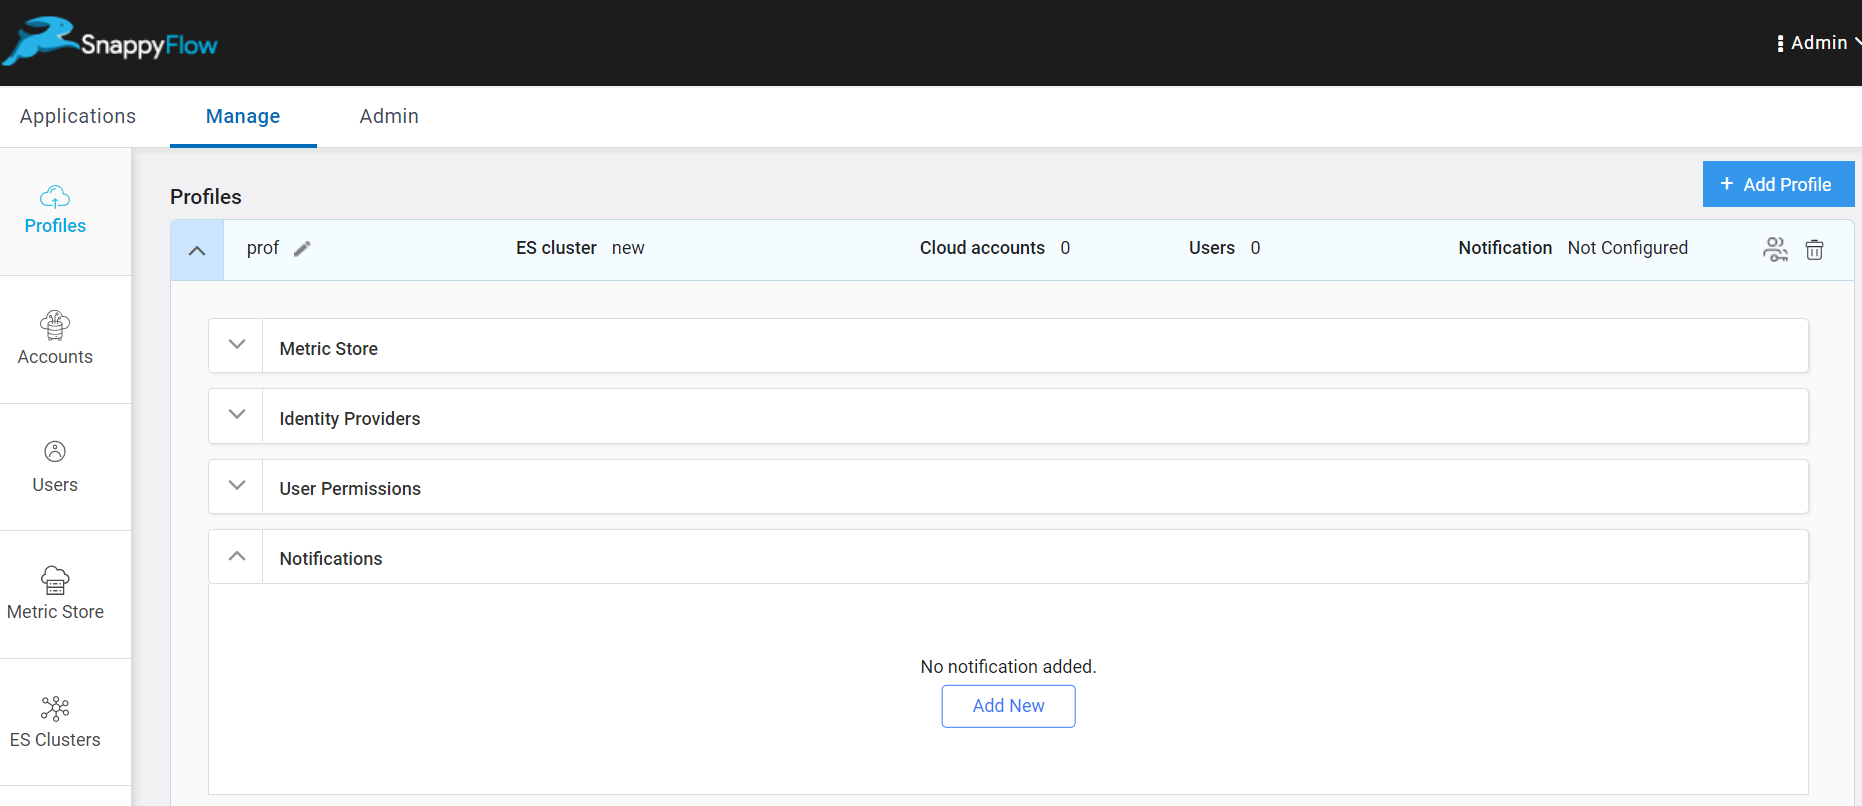
Go to the Manage tab.
Navigate to your Profile > Notifications section.
In the Notification section, click the
Add Newbutton.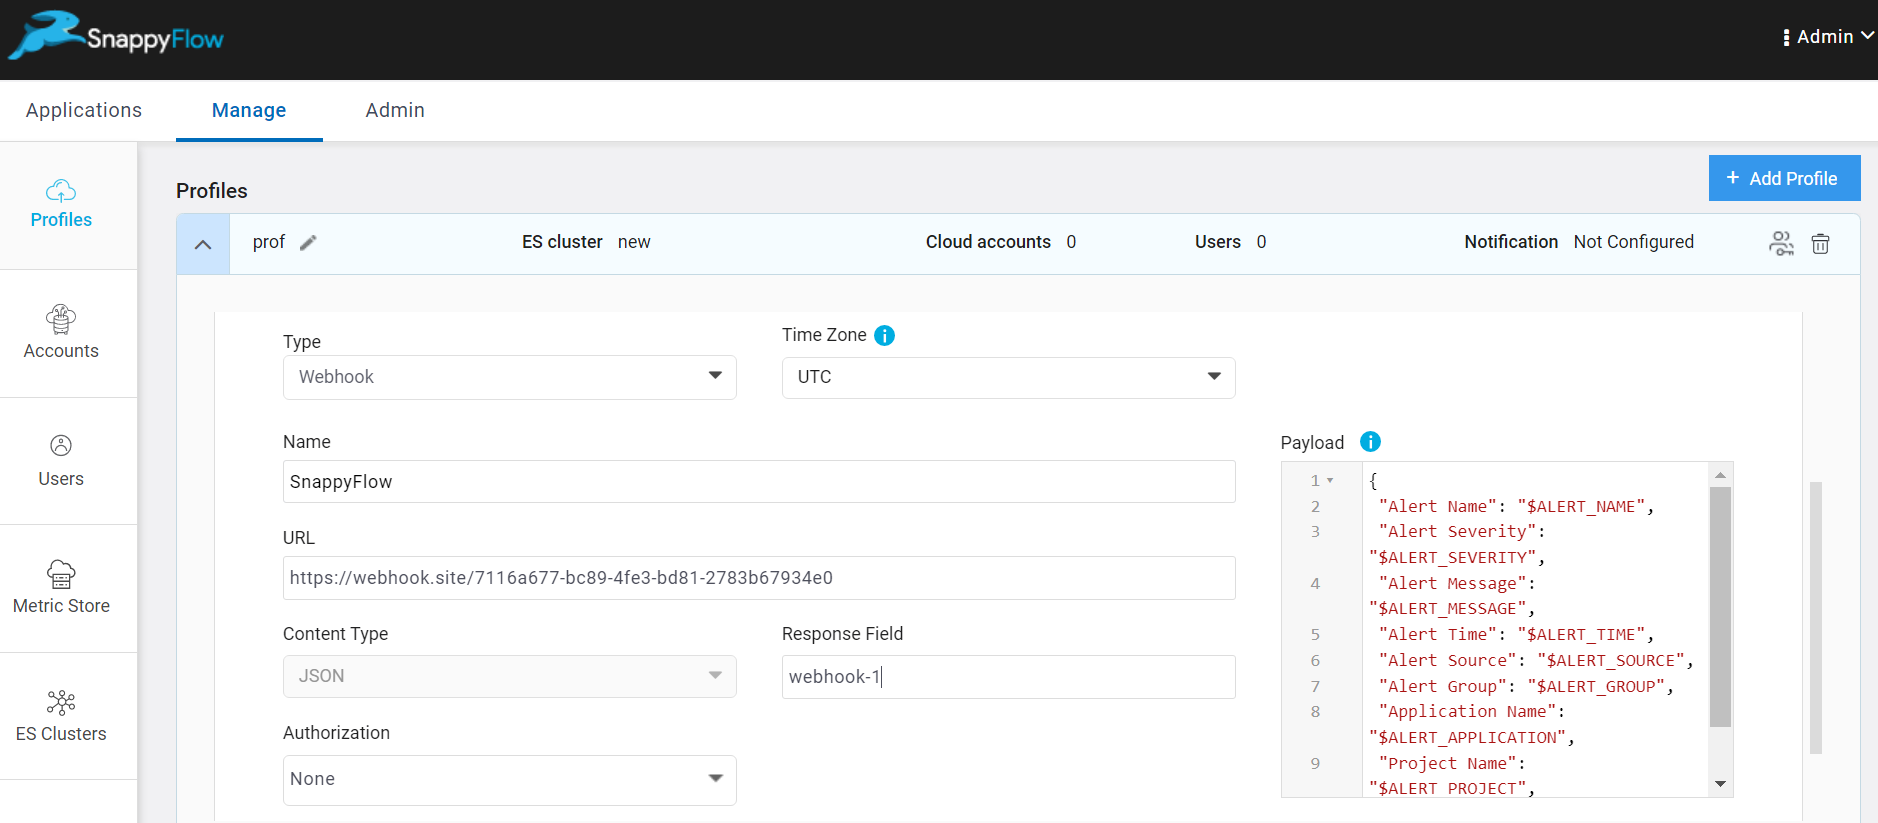
In the Add New Notification window, enter the required details:
- Type - Click the
drop-downicon and selectWebhook - Time Zone - Select your time zone
- Name - Provide a meaningful name for this channel
- URL - Webhook URL
- Response Field - Give an attribute to identify the notification from this channel
- Authorization - Choose an authorization (None, Token, OAuth 2.0). Based on the authorization provide the details from Webhook.
Authorization Details Required Token Security Key OAuth 2.0 Client ID, Client Secret (secret key), Token URL, Scope - Type - Click the
Click the
Verifybutton to verify the Webhook URL.Click the
Addbutton.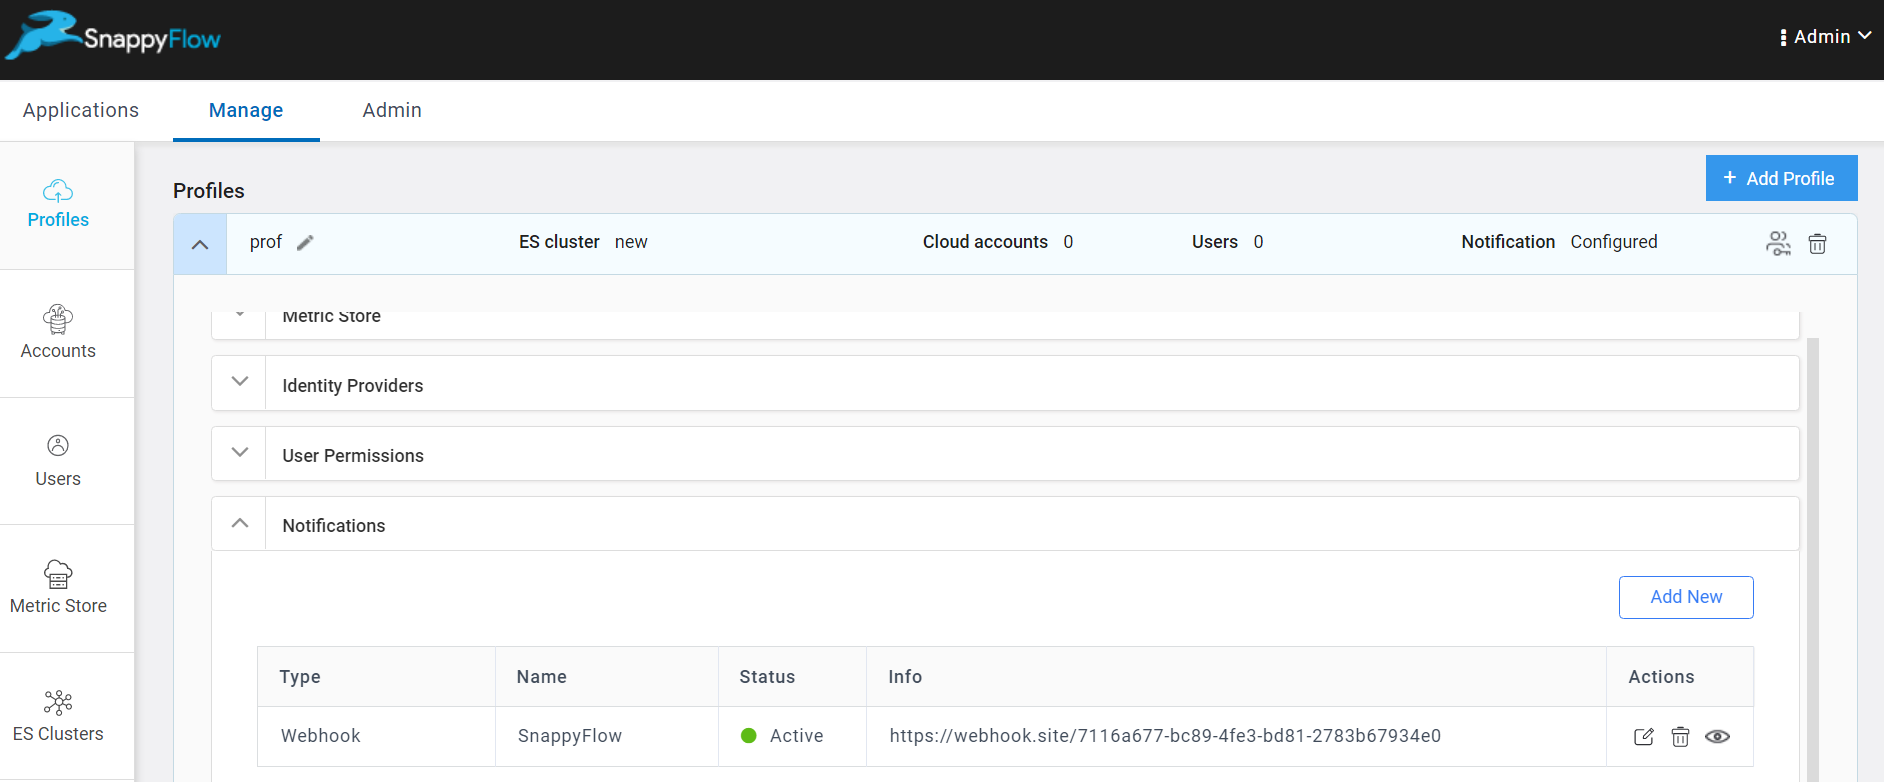
A table with the channel details will be generated as shown in the above image. The table has the following details:
- Type - Notification type
- Name - Name of the notification channel
- Status - Current state of integration
- Action - The action column has options to Edit and Delete the channel
Click the
Add newbutton to create multiple Webhook notification channels.
Add the Channel to the Project
The next step is to add the notification channel to your project Click here.