Create an Email Notification Channel
Prerequisites
You need an active SMTP compatible email server or email subscription. To get SMTP username, password and port details reach out to your email server admin.
- SMTP username
- SMTP password
- SMTP port
For Gmail users, your account email and password will be the SMTP username and password respectively. The deault SMTP port is 465. For more information, check this link.
Step by Step Guide
Follow the below steps to create an Email notification channel in SnappyFlow. Only SMTP is supported.

Go to the Manage (1) tab.
Click the
down arrow(2) icon near your profile.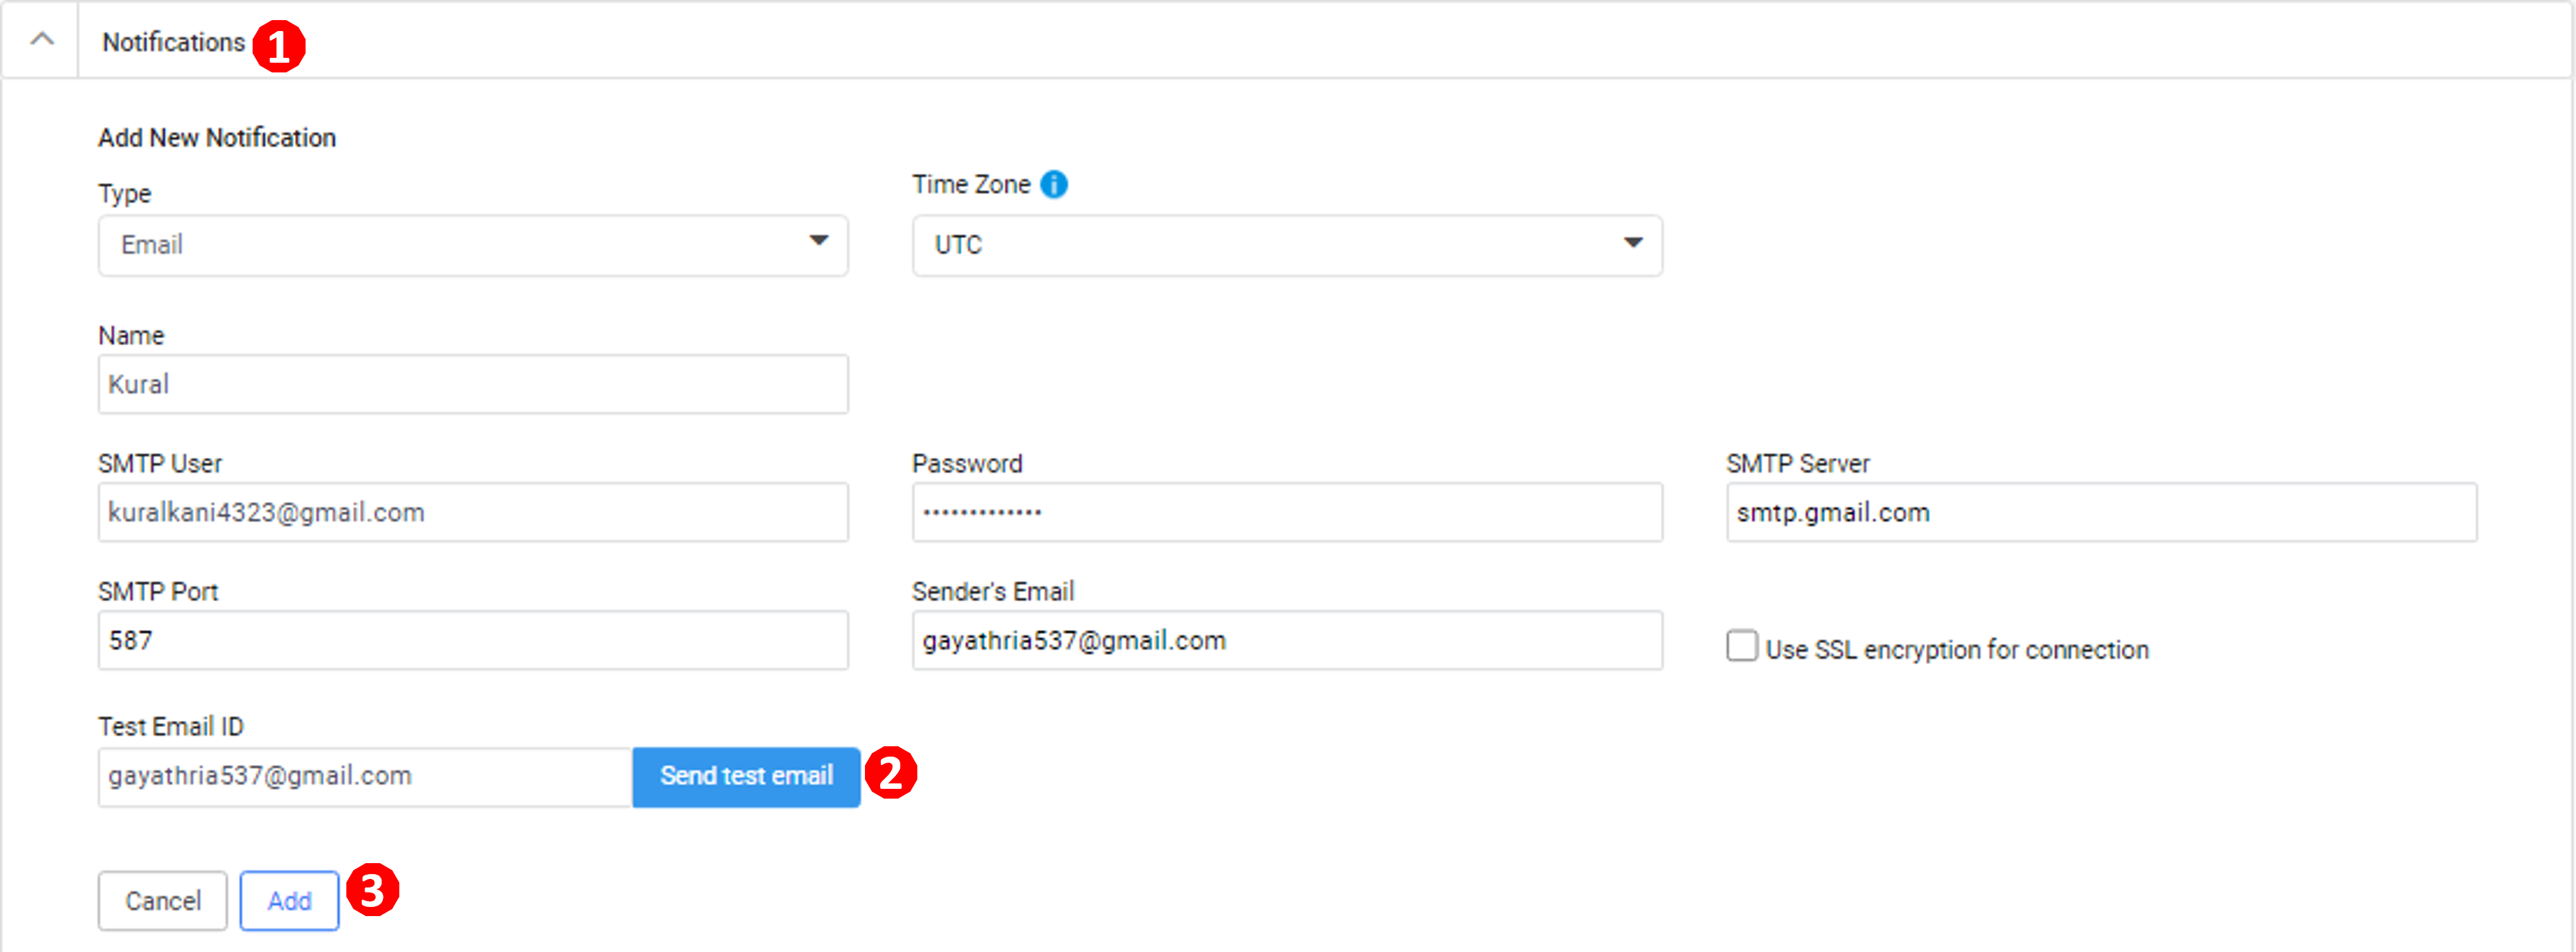
Go to the Notifications (1) section.
Enter the required details
Type - Select
Email.Time Zone - Choose your time zone.
Name - Provide a meaningful name to this channel.
SMTP User - Email account using which emails notifications will be sent.
Password -Type the Simple Mail Transfer Protocol (SMTP) user password.
SMTP Server- Type the SMTP server address (Eg: smtp.gmail.com).
SMTP Port -Type SMTP port number (Eg: For Gmail - 507).
Sender's Email - The email notification will display this email as sender.
Send a test Email to verify your SMPT server. Follow the below steps:
a. Enter your Email address in the Test Email ID column.
b. Click the Send test email (2) button.
c. You will receive a test email .
Receriver email id is configured in Step 3: Map Alerts to Notification Channel. For each alert, a differnt receiver id can be configured if required.
Click the
Add(3) button to complete the creation.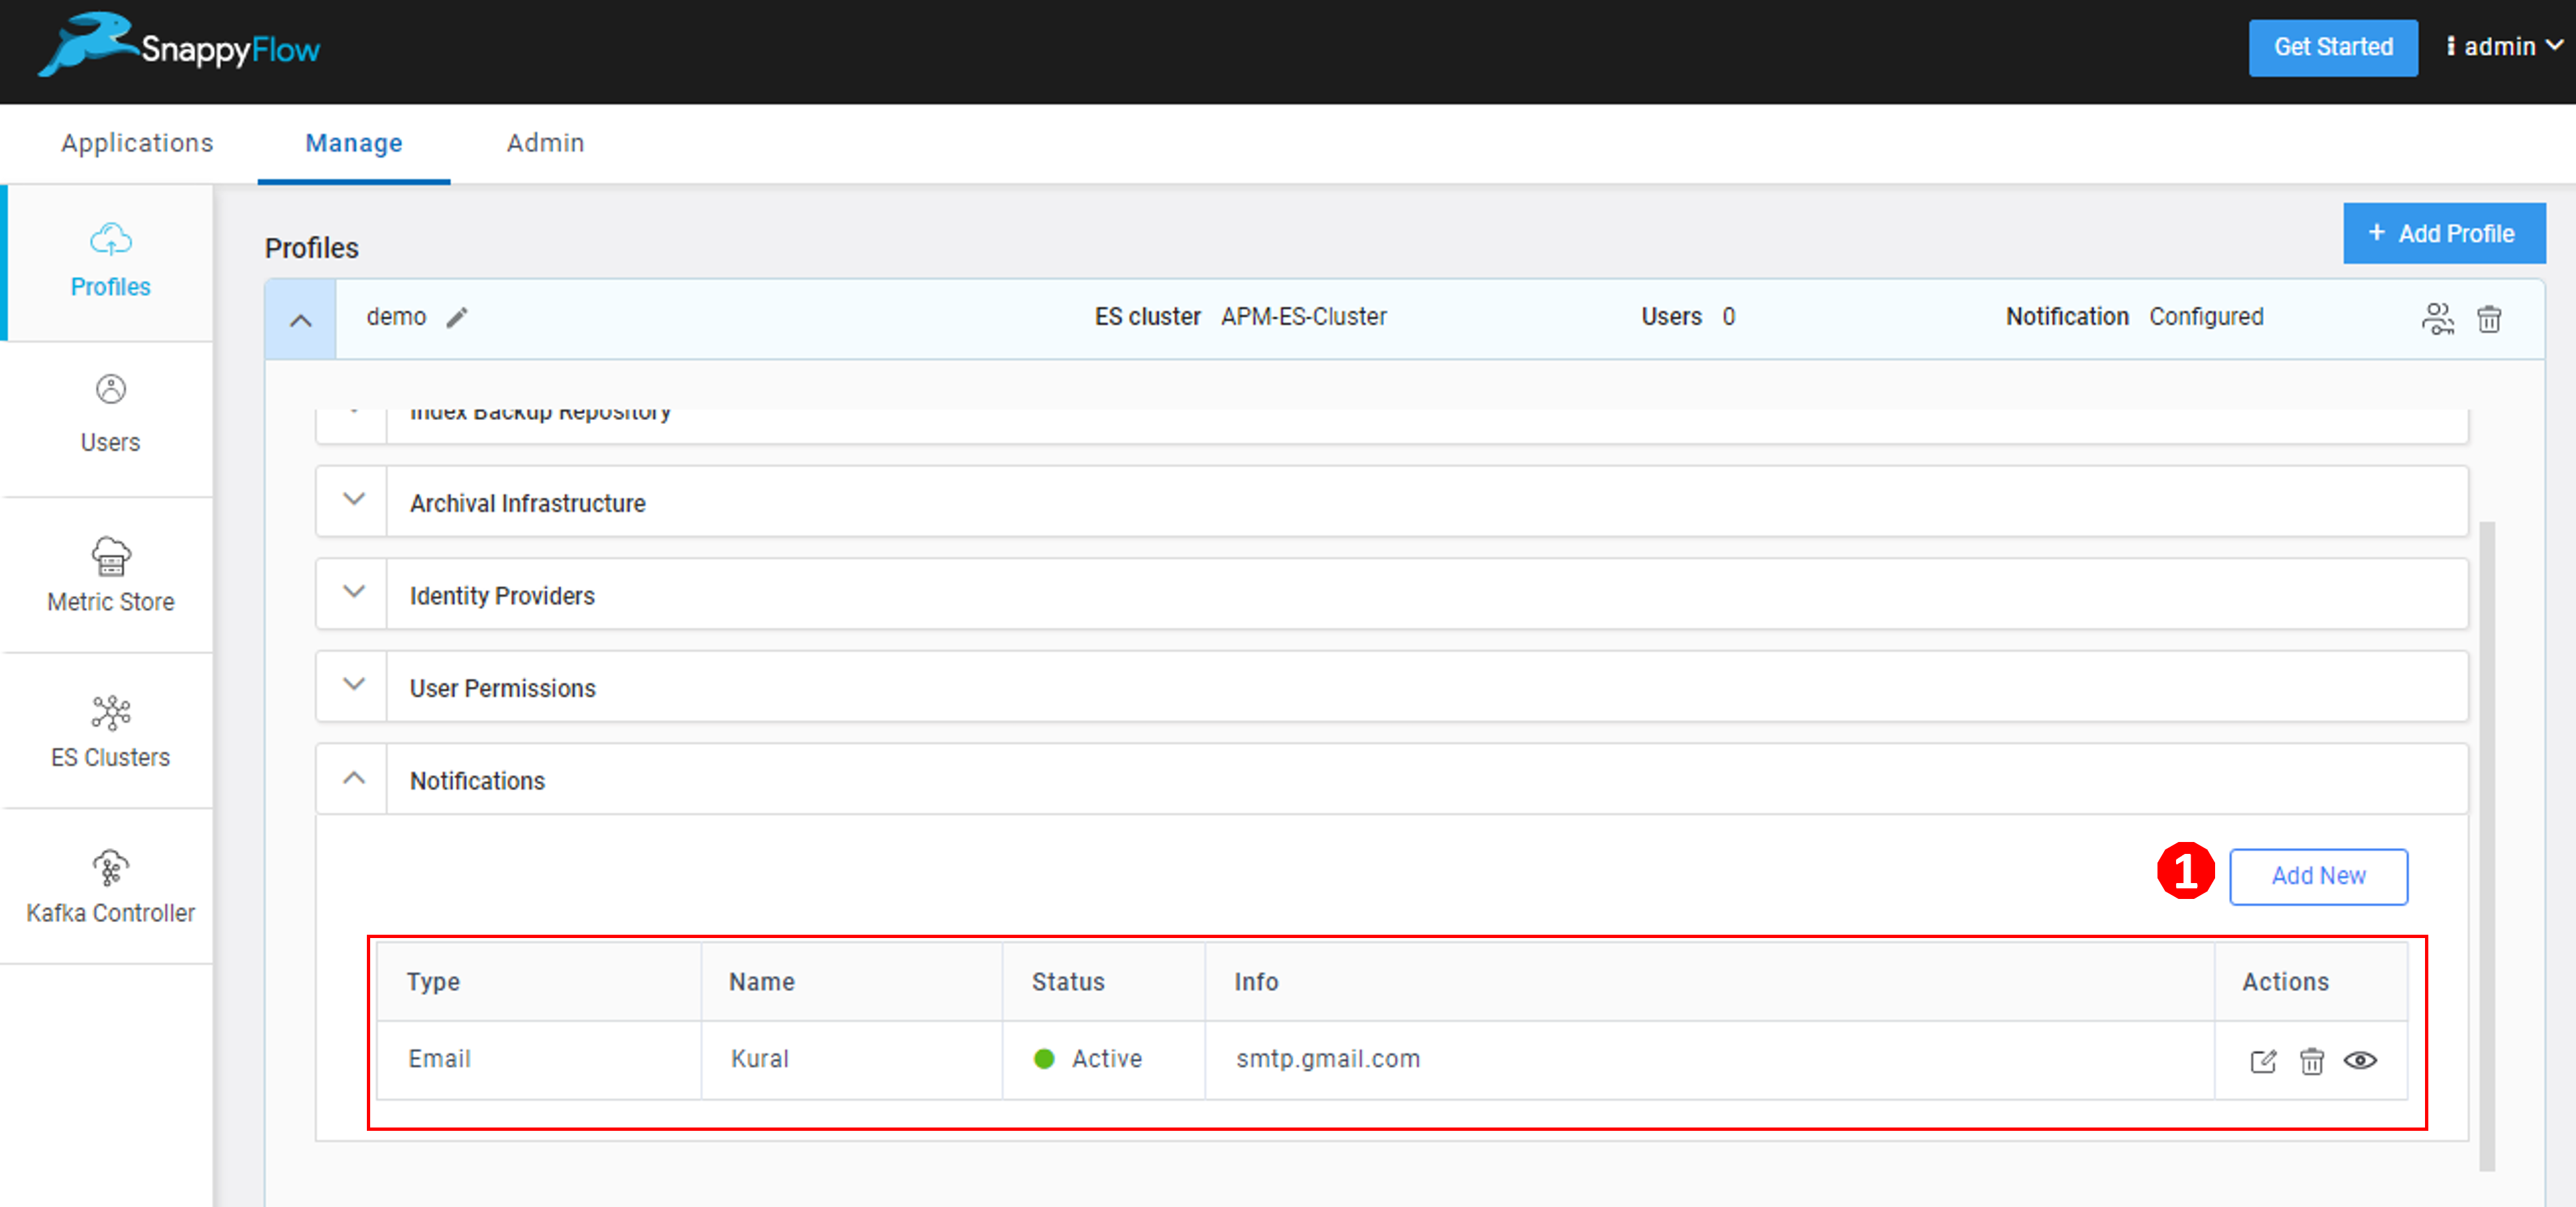
The table with user details will be auto-generated as shown in the above image. The table consists of the following details.
- Type - Notification type
- Name - Profile Name
- Status - State of integration
- Info - SMTP server address
- Action - The action column has options to Edit, Delete, and View the profile
Click the
Add new(1) button to create multiple Email notification profiles.You have successfully created an Email notification channel. The next step is to map the notification channel to your project Click here.