Manage Logs
Overview
By default, all ingested logs are stored in the primary storage for maximum of 7 days. You can access log related data in the Primary Storage pane of the Log Management section. If you wish to view logs beyond the 7-day retention period, they should be stored in the Secondary Storage.
In the Manage Logs pane, you can establish rules for each plugin/document type to determine whether logs should be stored in primary storage or secondary storage.
Rules: The rules helps you to enable or disable Primary Storage and Secondary Storage for a plugin + document type combination.
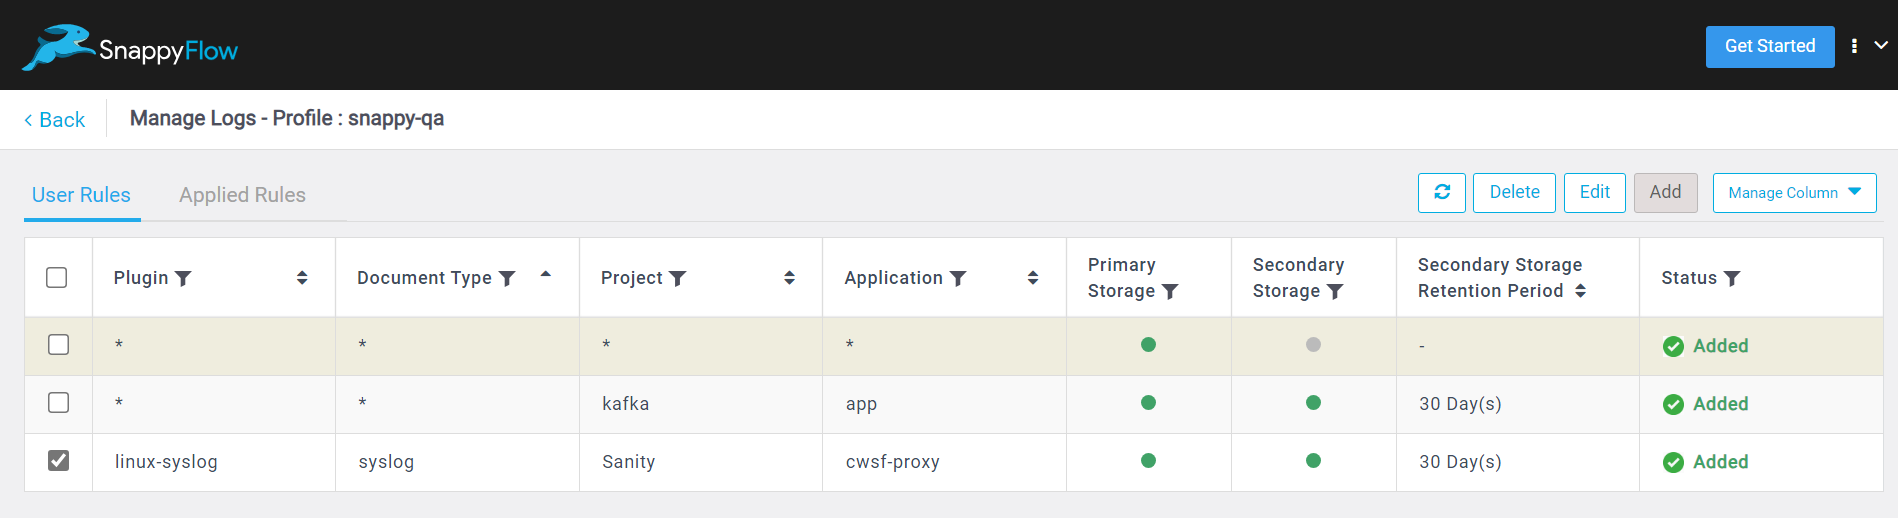
Components of Manage Logs Pane
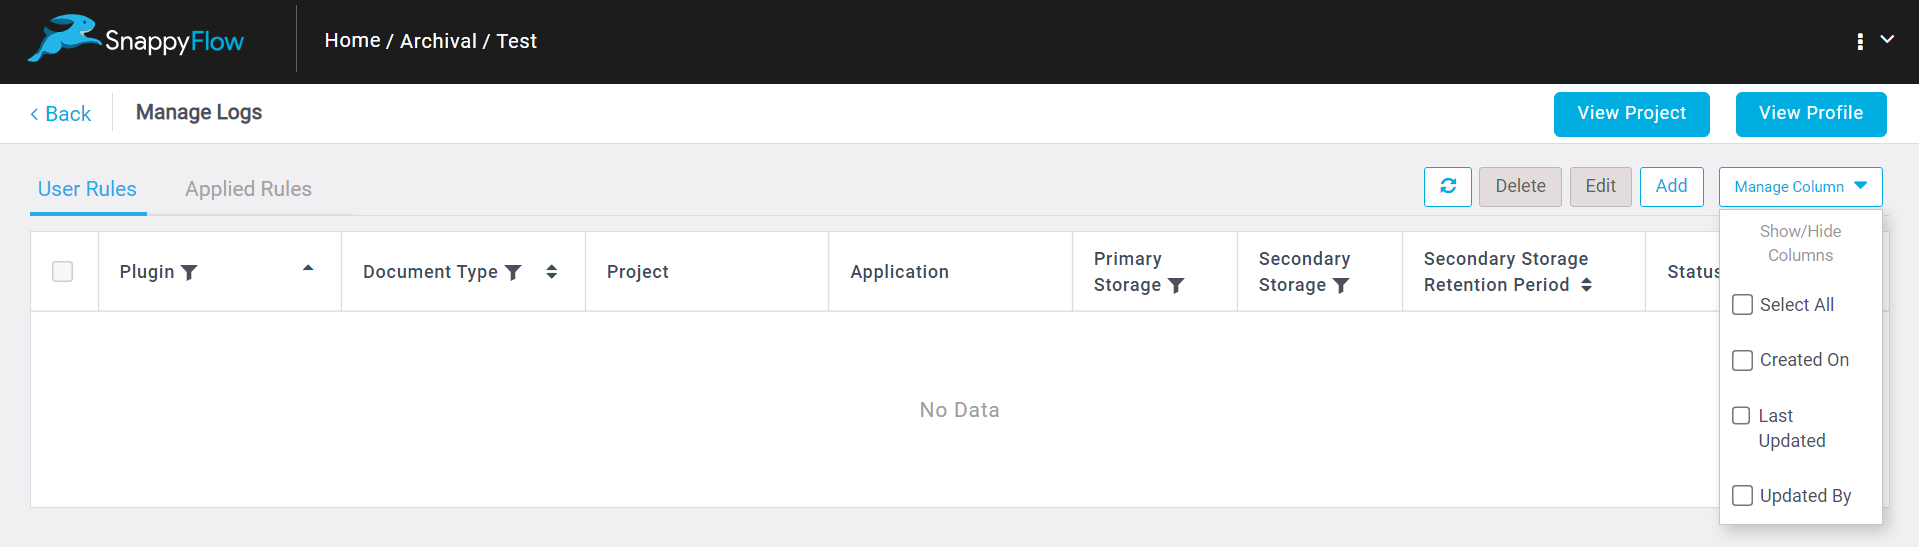
View Project - Enables you to view, add, edit and delete the rule(s) set for logs at project level.
View Profile - Enables you to view add, edit and delete the rule(s) set for logs at profile level.
User Rules - Enables you to set rules for logs at plugin level.
Applied Rules - Enables you to view the rules set for the logs.
Refresh - Enables you the refresh the window.
Delete - Enables you to delete rule(s) set for logs.
Edit - Enables you to edit rule(s) set for logs.
Add - Enables you to add rule(s) set for logs.
Manage Column - Enables you to select rules based on the following information: Created on, Last Updated, Updated By.
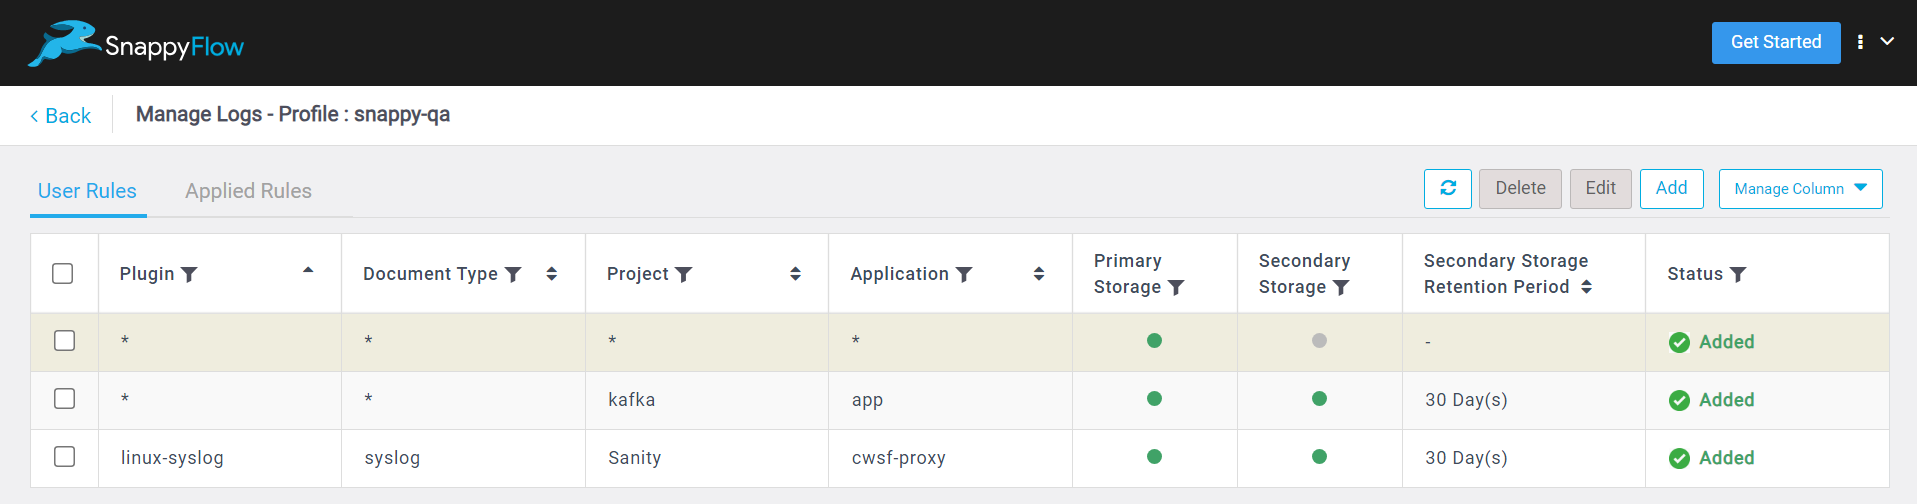
Plugin - Display the plugin name.
Document Type - Display the name of the document type.
Project - Displays the project name.
Application - Displays the application name.
Primary Storage - Displays whether the primary storage is enabled or disabled.
Secondary Storage - Displays whether the secondary storage is enabled or disabled.
Secondary Storage Retention Period - Displays the retention period of the logs in the secondary storage.
Status - Displays the status of the rule either Applied, In progress and Pending.
Secondary Storage | Size - Displays the size of the data stored in the secondary storage.
Secondary Storage | Started On - The date and time when the secondary storage is enabled are displayed.
Actions
Follow the steps give below to add, edit, delete and filter rule(s).
When multi-select is utilized and pagination is enabled, any changes made will only affect the rule displayed in the current window or page.
Add Rule(s)
Click the
Addbutton.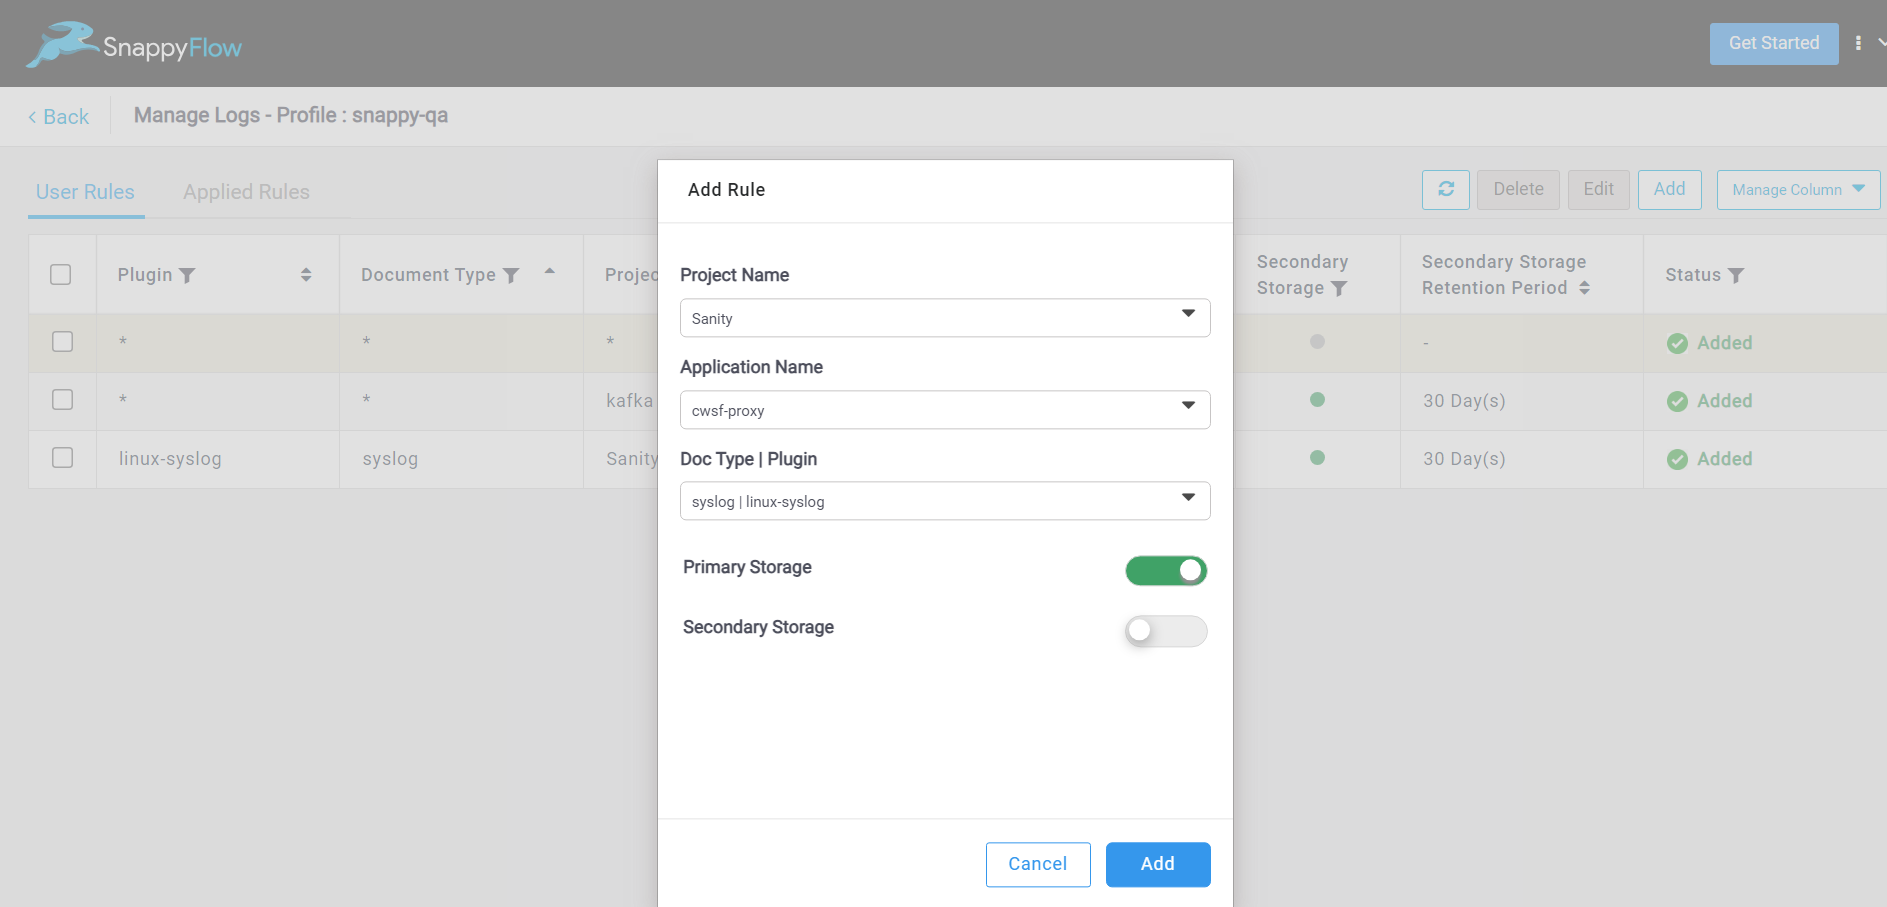
In the Add Rule window, give the following details:
- Project Name
- Application Name
- Doc Type or Plugin
By default, the Primary Storage is enabled and the Secondary Storage is disabled.
You have to enable the Secondary Storage to send logs and specify the desired retention period for storing them.
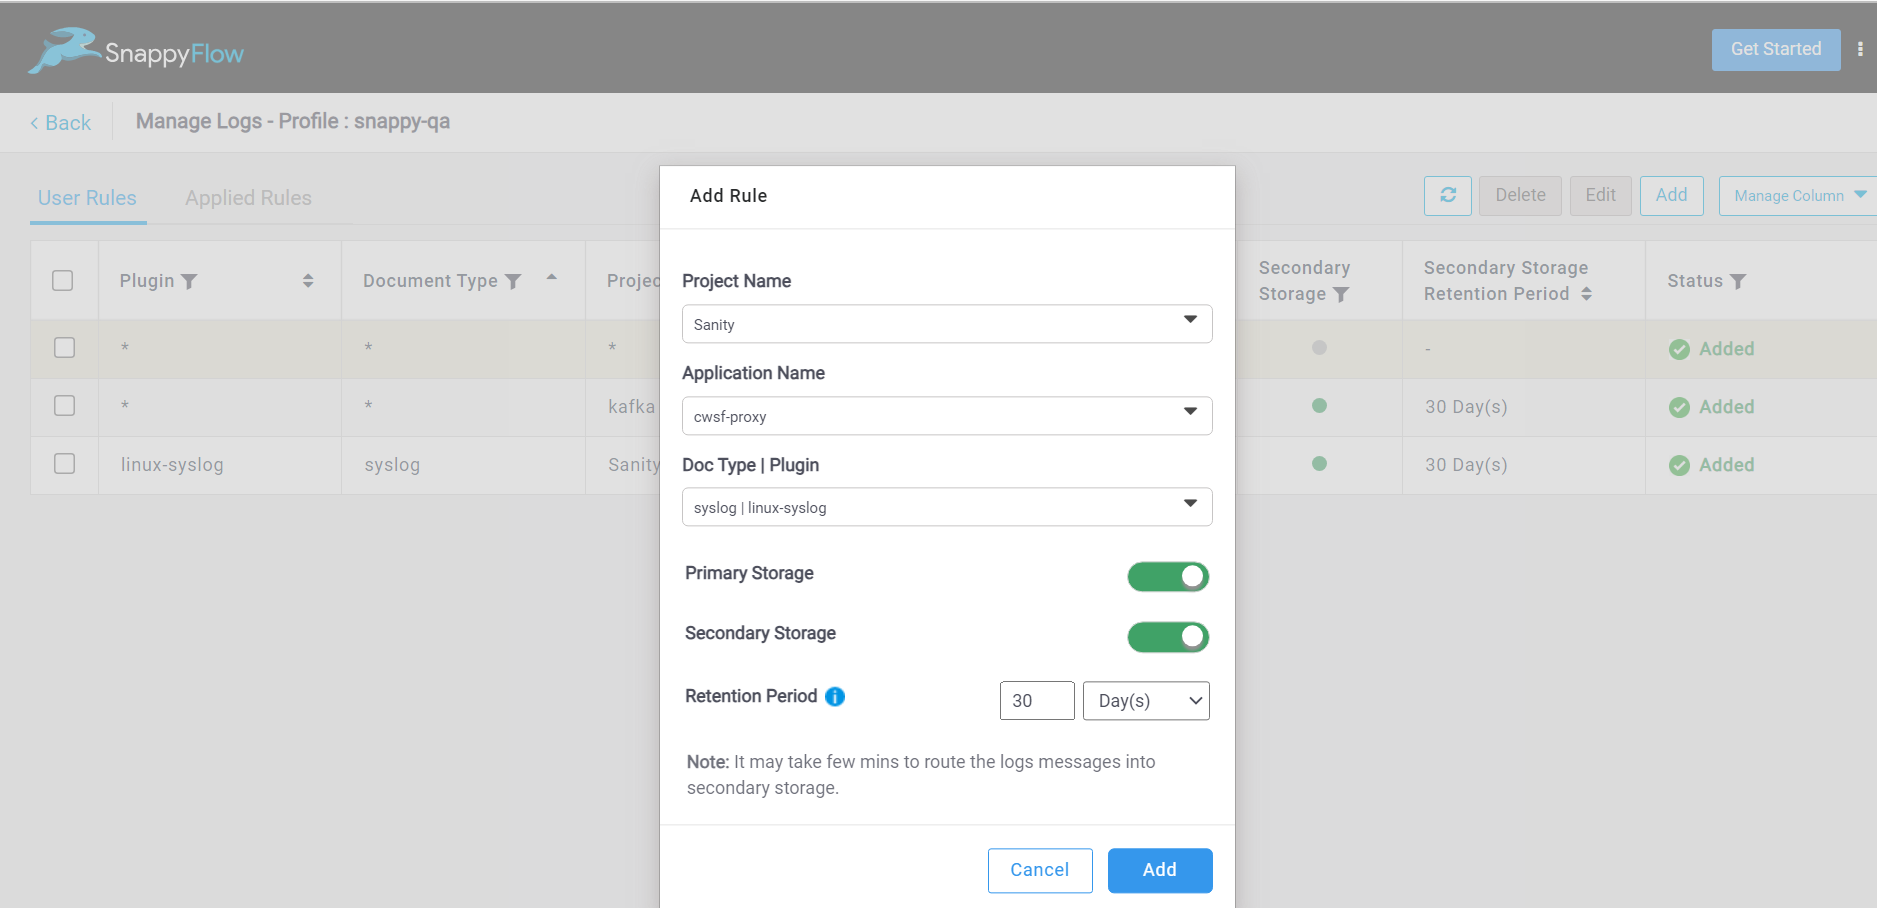
- If required enable Secondary Storage and set the Retention Period.
- Click the
Addbutton to save the rule.
Edit Rule(s)
By default, edit option is disabled. It will enable when a rule is selected.
Select the rule(s).
Click the
Editbutton.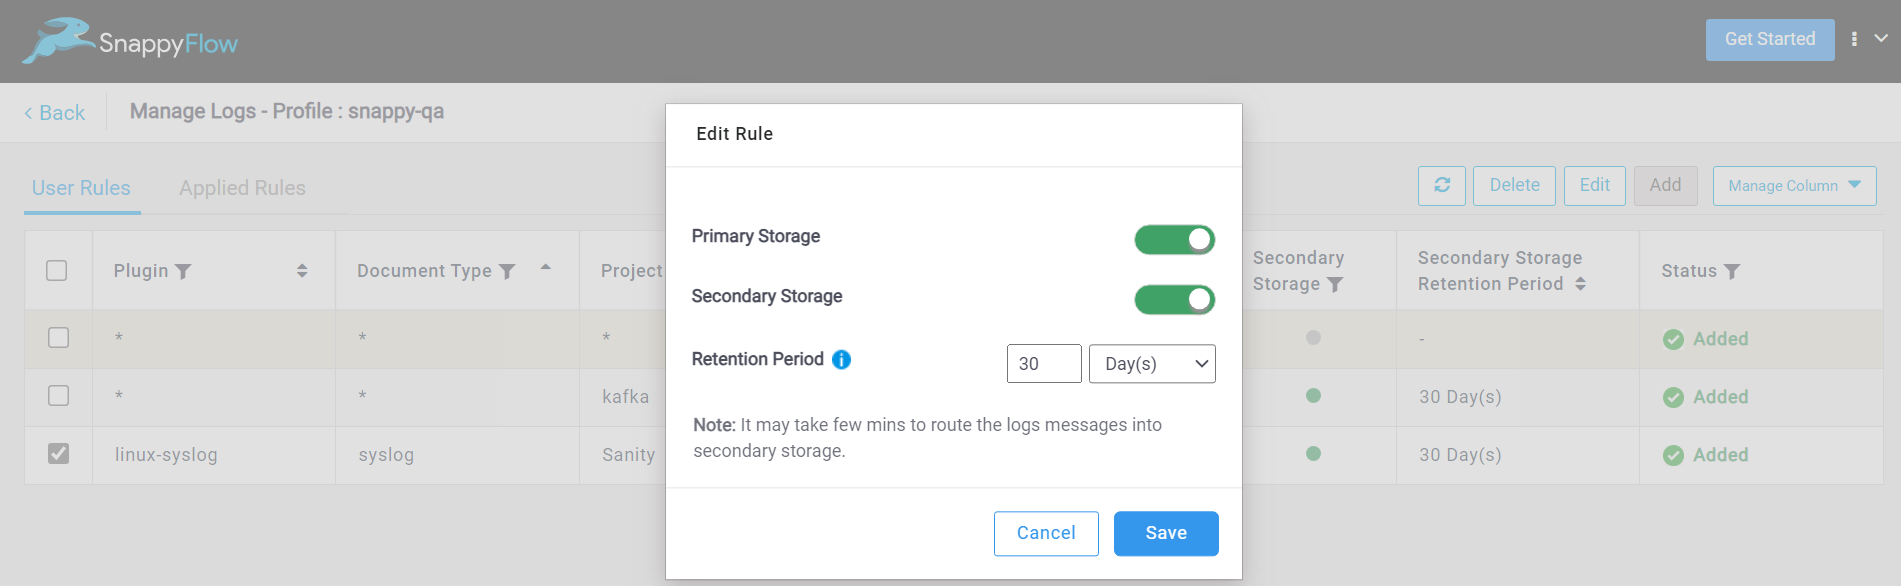
In the Edit Rule window, you can modify the information as required.
Click the
Savebutton the save the changes.The changes will be reflected in the UI.
Delete Rule(s)
By default, delete option is disabled. It will enable when a rule is selected. The delete option remains disabled for the default rule.
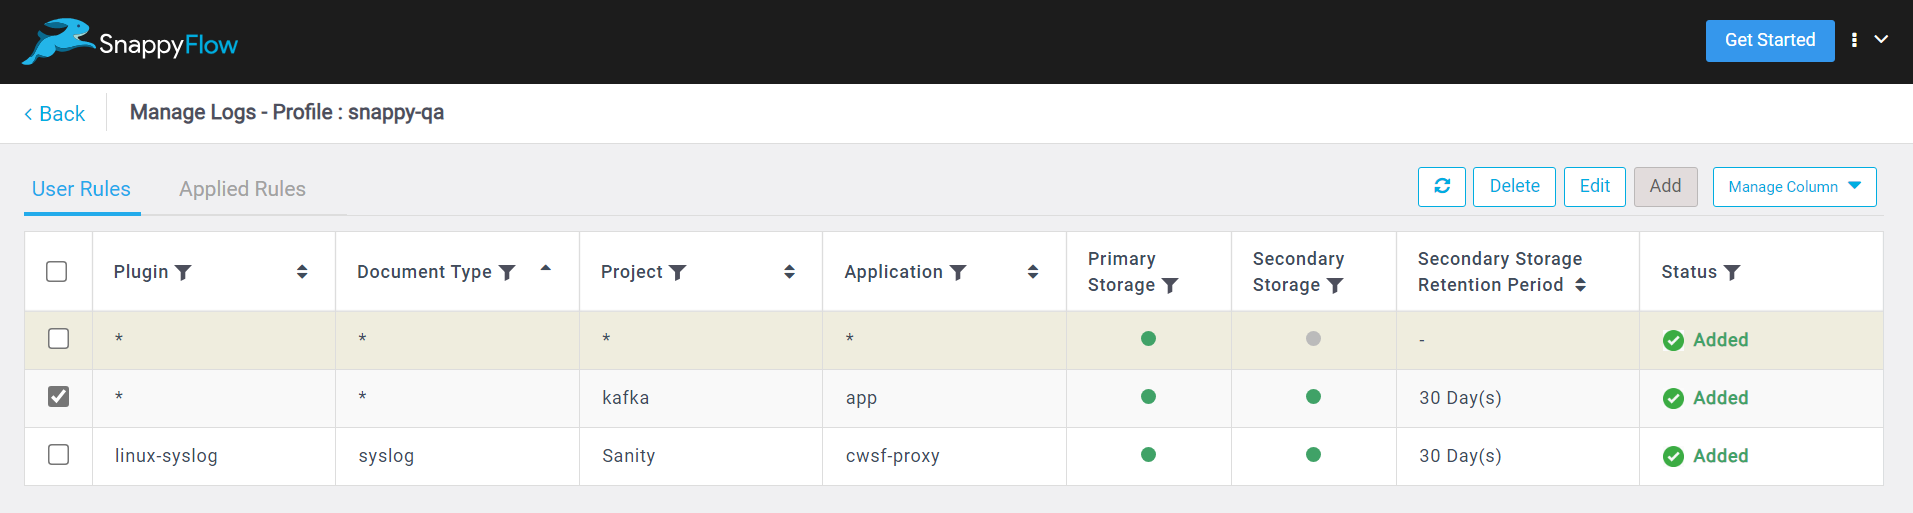
Select the rule(s).
Click the
Deletebutton.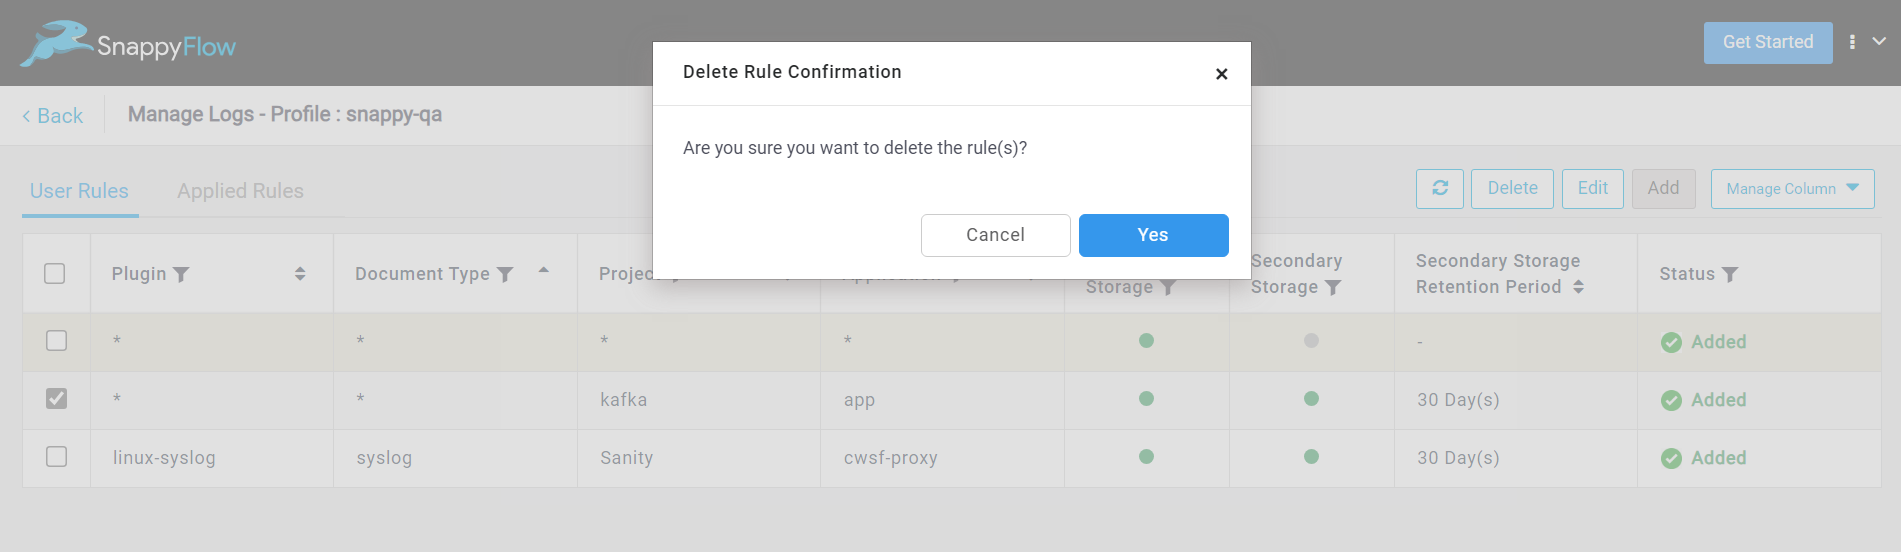
In the Delete Rule Confirmation window, click the
Yesbutton.The changes will be reflected in the UI.
Filter Rule(s)
You have the ability to sort or filter the rules according to plugin, document type, application, and project names. Additionally, they can utilize multi-select filters for the Primary Storage, Secondary Storage, and Status fields.
Click the Filter icon.
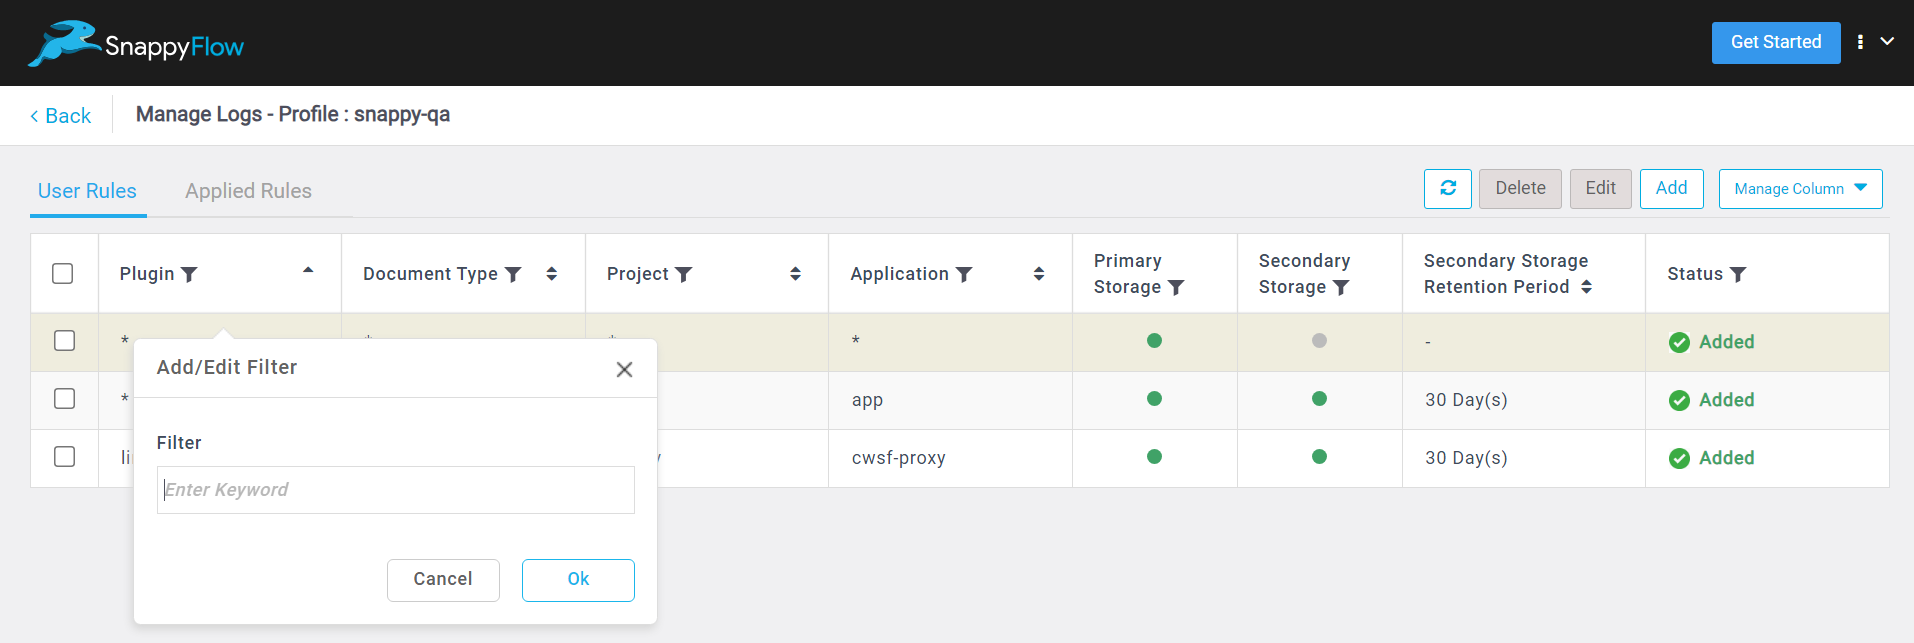
In the Add/Edit Filter window, enter the Keyword that need to be filtered and click the Ok button.
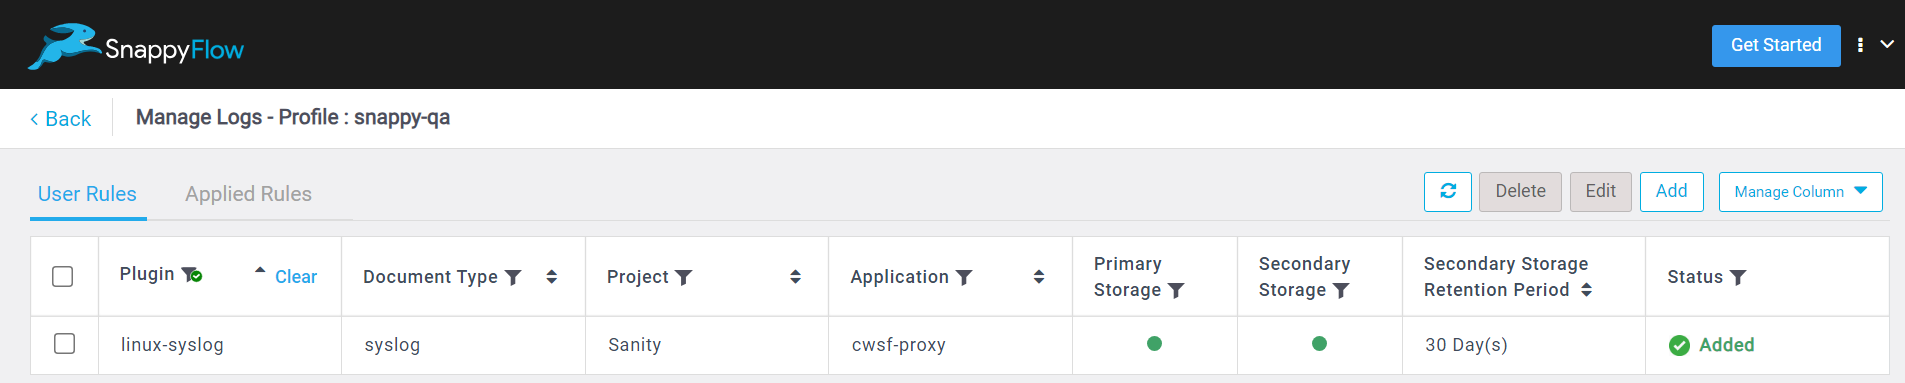
The changes will be reflected in the UI.
To clear the filter, click the
Clearoption.