Monitor PHP Application in ECS
Prerequisite
- Install sfagent to integrate your application with SnappyFlow.
- Make sure that the project and application are created in the SnappyFlow server. If not, click here to create a project and an application in SnappyFlow.
- Provide the
PROFILE_KEY,PROJECT_NAME, andAPP_NAMEin theconfig.yamlfile.
Configuration
Download the shell script into the root folder of the project.
https://raw.githubusercontent.com/snappyflow/apm-agent-php/1.9x/install_elastic_apm.sh
Add the
config.yamlto the project root folder.Make sure that the
projectName,appNameandprofileKeyvalues are correct.Add the following changes to the Docker file of the project and build the image.
# Begin Snappyflow changes
RUN apk add --no-cache wget git curl-dev bash jq
RUN mkdir -p /opt/elasticapm/phpagent
RUN mkdir -p /opt/sfagent
RUN wget https://github.com/snappyflow/apm-agent/releases/download/latest/sftrace-agent.tar.gz
RUN tar -zxvf sftrace-agent.tar.gz >/dev/null && mv -f sftrace /opt/sfagent && mv -f /opt/sfagent/sftrace/sftrace /bin && mv -f /opt/sfagent/sftrace/java/sftrace /opt/sfagent/sftrace
ADD ./config.yaml /opt/sfagent/config.yaml
ADD ./install_elastic_apm.sh /mnt
RUN chmod +x /mnt/install_elastic_apm.sh
# Specify trace service name
RUN /mnt/install_elastic_apm.sh <service-name>
# End Snappyflow ChangesnoteTracing service name should be specified in Docker build step.
noteIn case, if you need to update Snappyflow
projectName,appNameorprofileKeythen you need to uninstall the existing PHP agent and install the agent again. While installing the agent back update theprojectName,appNameandprofileKey.
View Trace Data
Follow the below steps to view the trace data.
Go to the Application tab in SnappyFlow and navigate to your Project > Application > Dashboard.
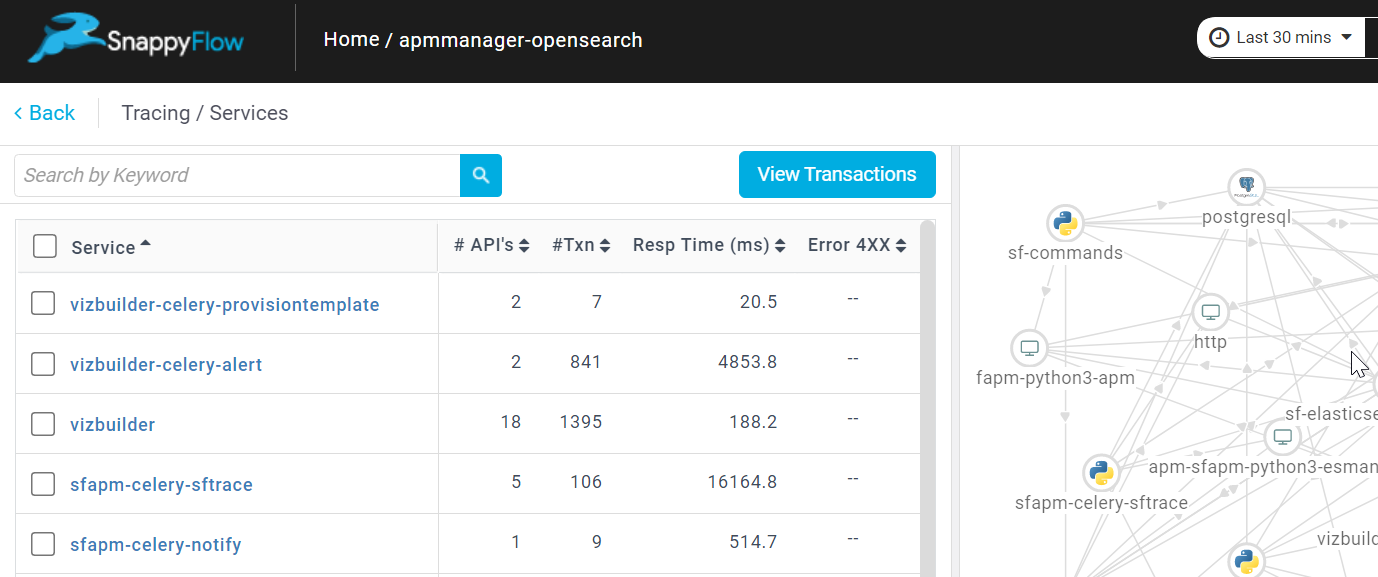
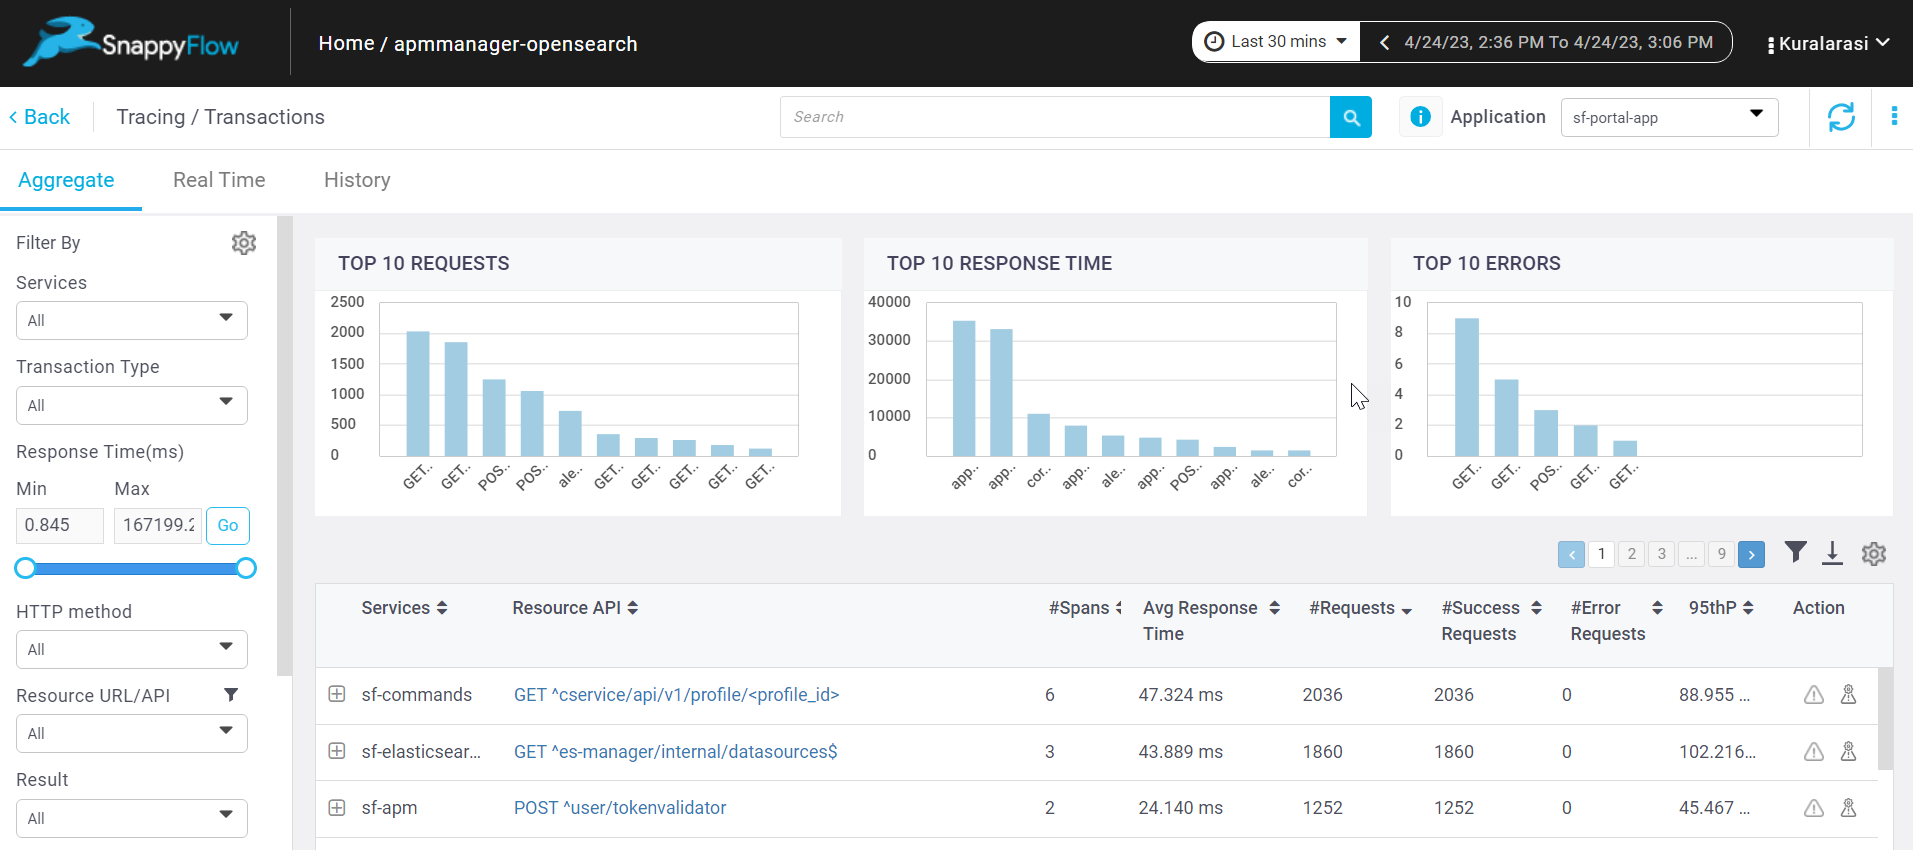
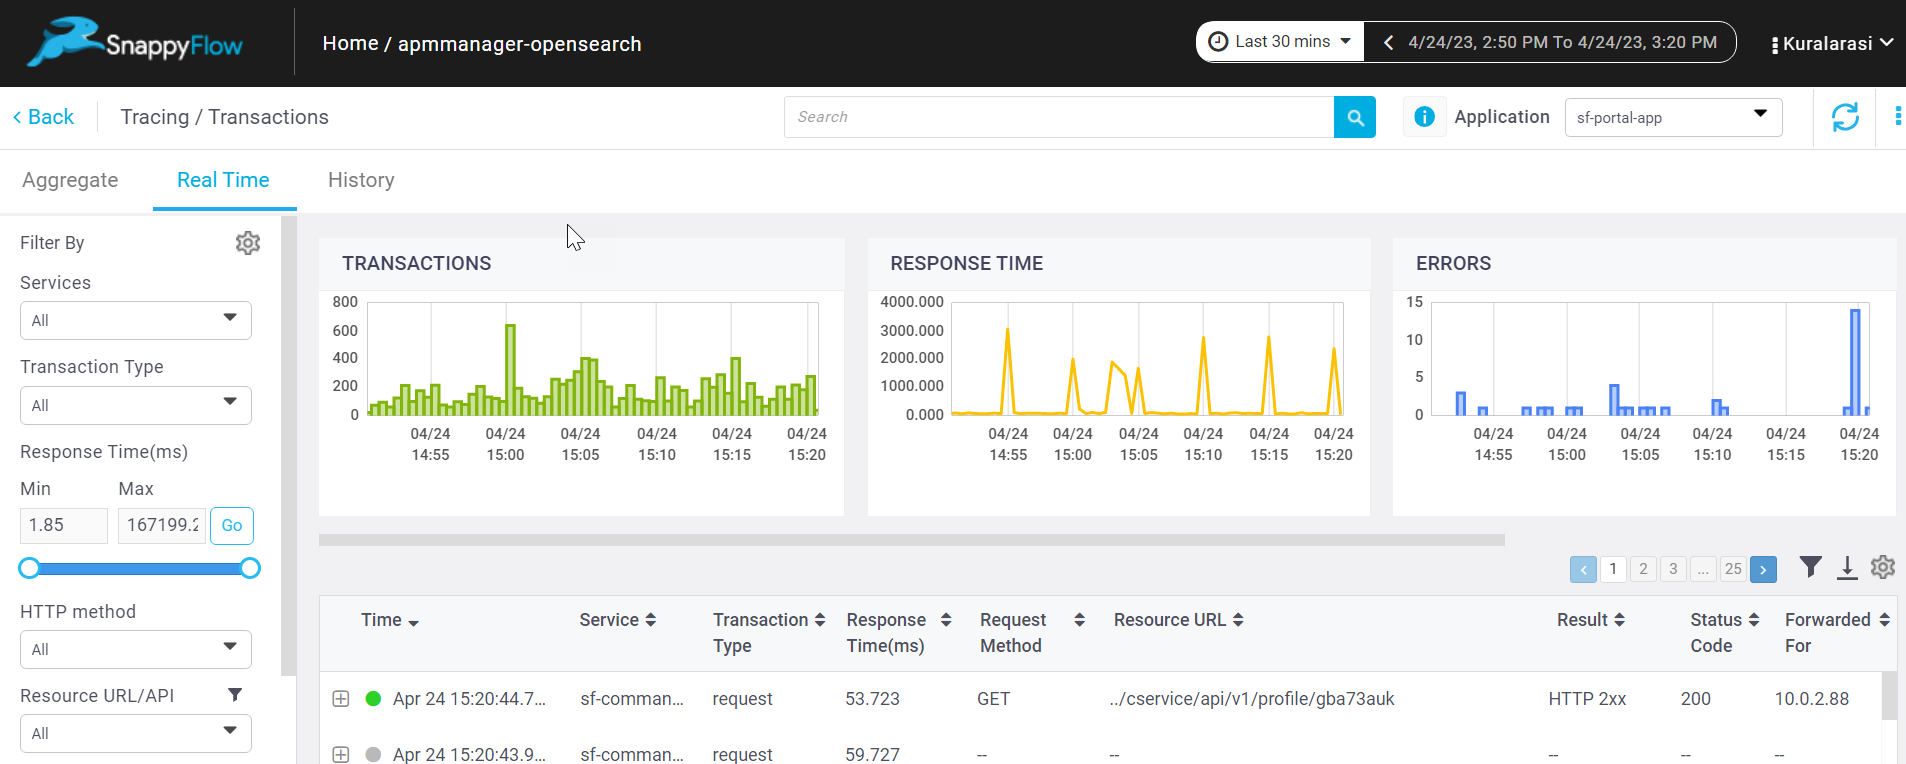
In the dashboard window, navigate to the Tracing section and click the
View Transactionsbutton.You can view the traces in the Aggregate and the Real Time tabs.
Steps to Uninstall PHP Agent
Download the PHP agent configuration.
https://raw.githubusercontent.com/snappyflow/apm-agent-php/1.x/before-uninstall.sh
Use the below-given command to assign executable permission.
chmod +x ./before-uninstall.shRun the below script with sudo.
sudo ./before-uninstall.shRestart the PHP service.