Monitor Cloud Services
Overview
To Monitor cloud services you require sfPoller. sfPoller collects metrics from your cloud services and send these metrics to SnappyFlow. You can access and visualize these metrics through SnappyFlow dashboard. These metrics will enable you to gain valuable insights into the performance and health of your cloud services. In SnappyFlow-Selfhosted Lite model, sfPoller is integrated as a part of the product.
Steps to initiate monitoring for cloud services
Login into your SnappyFlow account.
Click the drop-down near to the
+ Add Newbutton at the top right corner of the page.
Select
Discover Endpointsoption.There are three major steps to discover an endpoint.
- Accounts - Add a cloud account
- Choose Project - Link a project and an application
- Discover Endpoints - Add an endpoint to the project and application
Add Cloud Account
Follow the below steps to add a Cloud Account.
Select the
+ Add Accountbutton.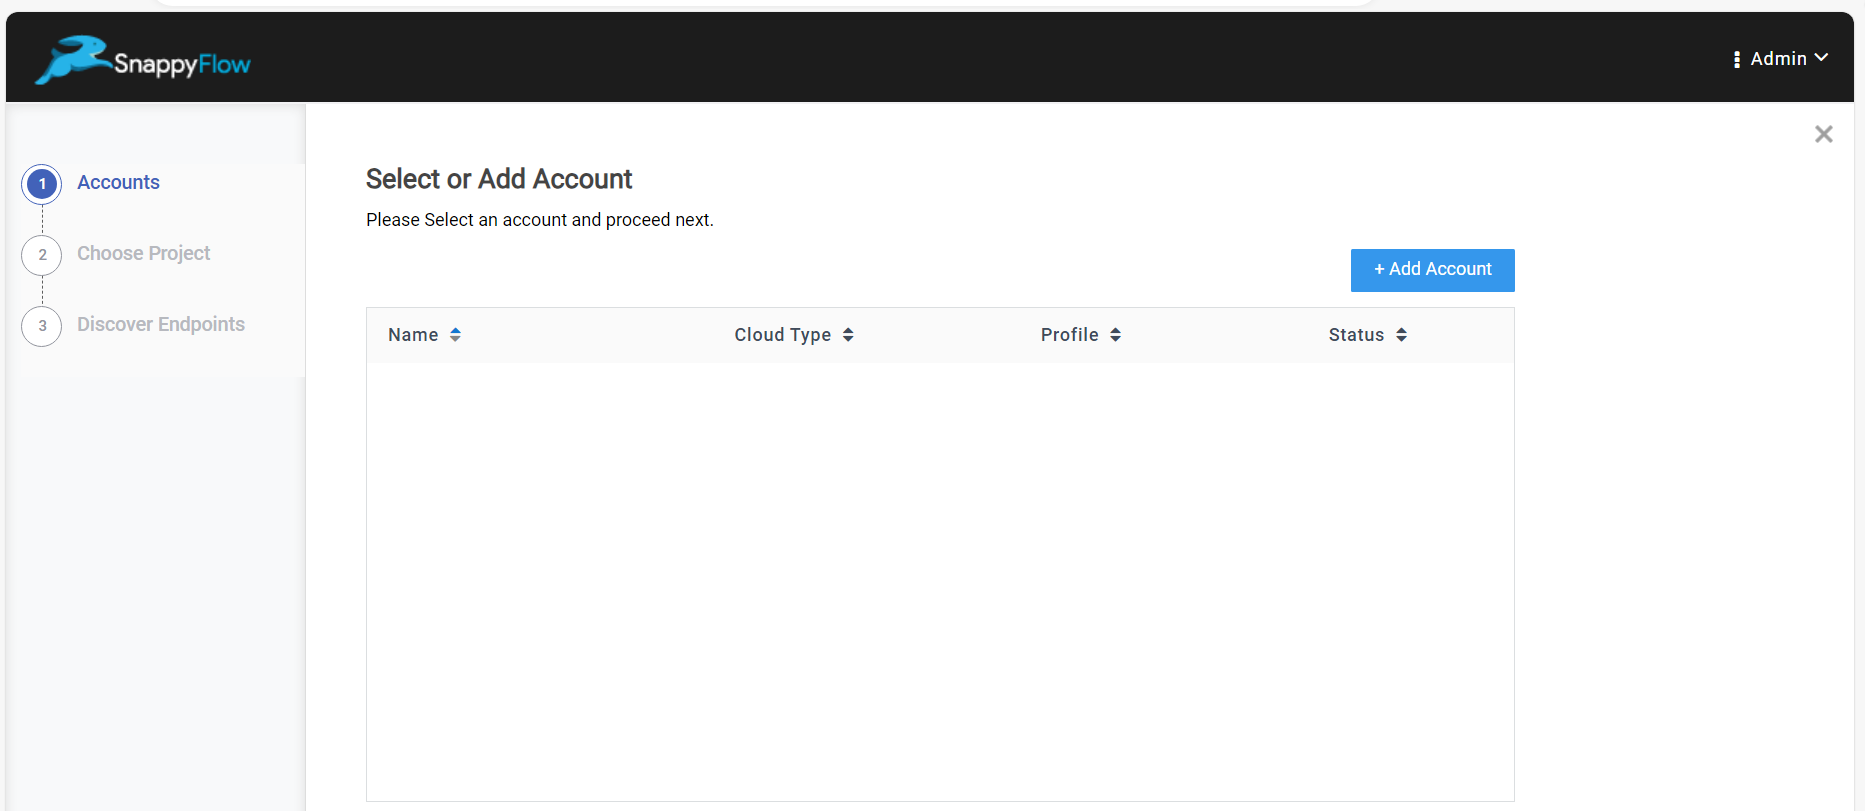
In the Add Account window, first choose your account type and fill in the details accordingly.
For Account type - AWS, add the following details:
Account Name - Give a meaningful name to your cloud account
Profile - Add the SnappyFlow Profile that you need to link to your cloud account
Access Type: Choose your access type - Use IAM role or Use access credentials.
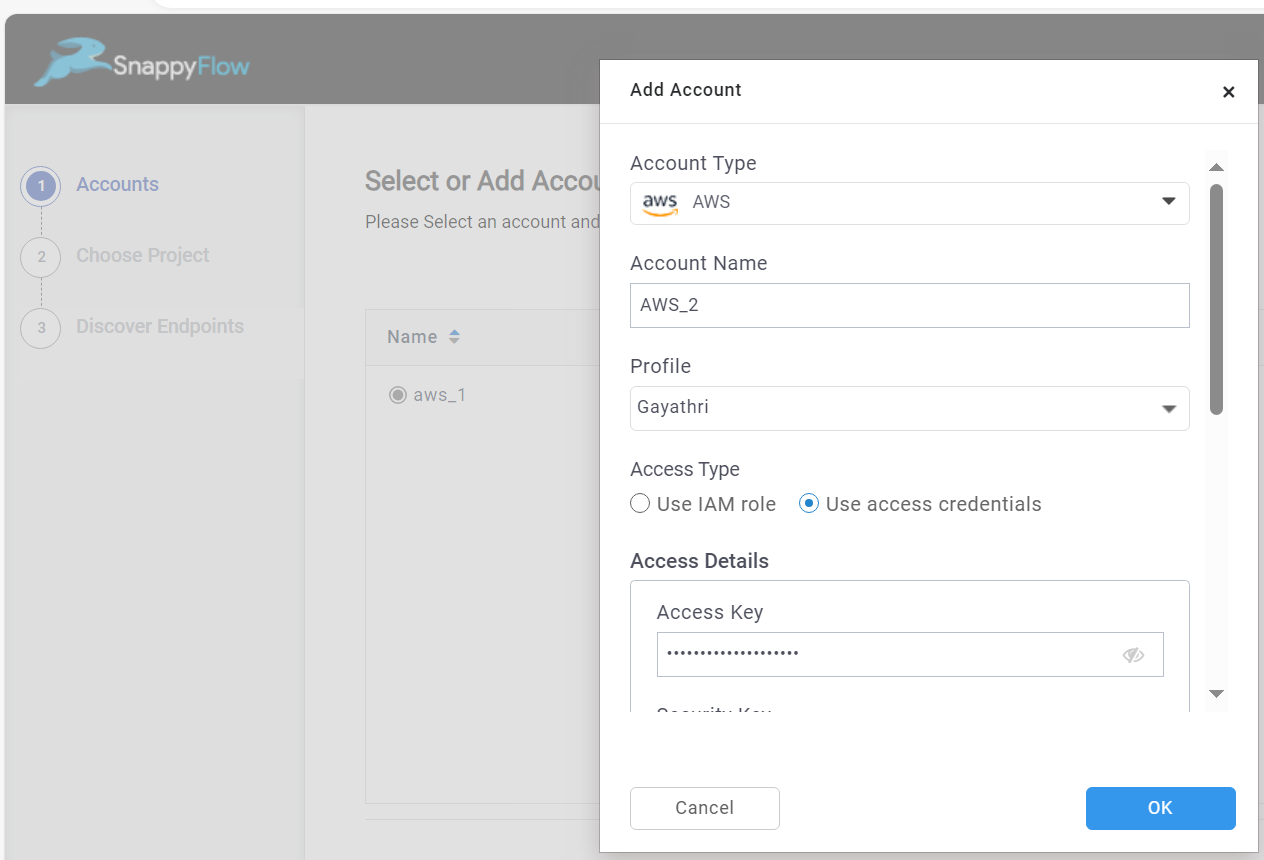
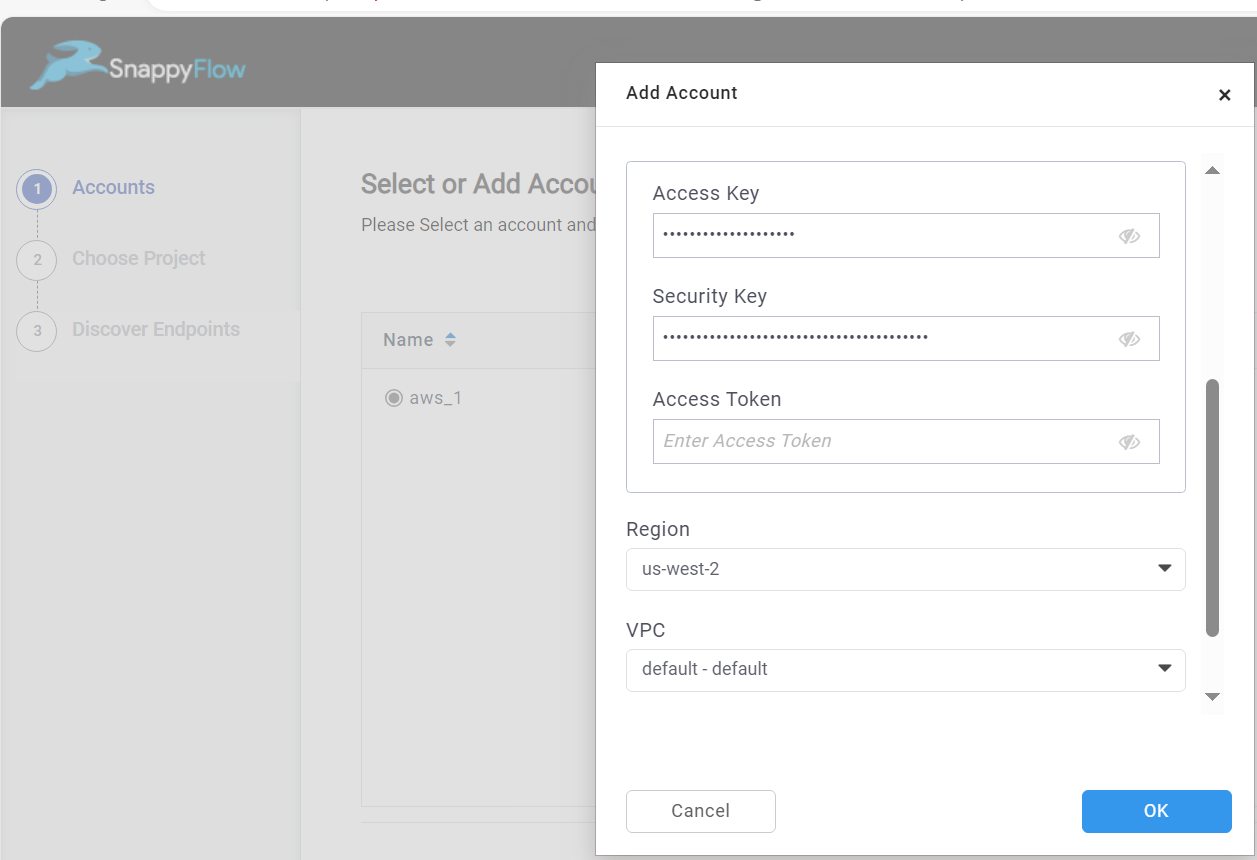
In the Access Details section, give the Access Key, Security Key and Access Token (optional).
Region: Select a region from the drop-down
VPC: Select your VPC from the drop-down.
Check the
Enable Monitoringcheckbox.Add the following to information in the Cost Analysis section. For example refer the below image.
- Cost Tag
- Frequency
- Bucket Name
- Report Path
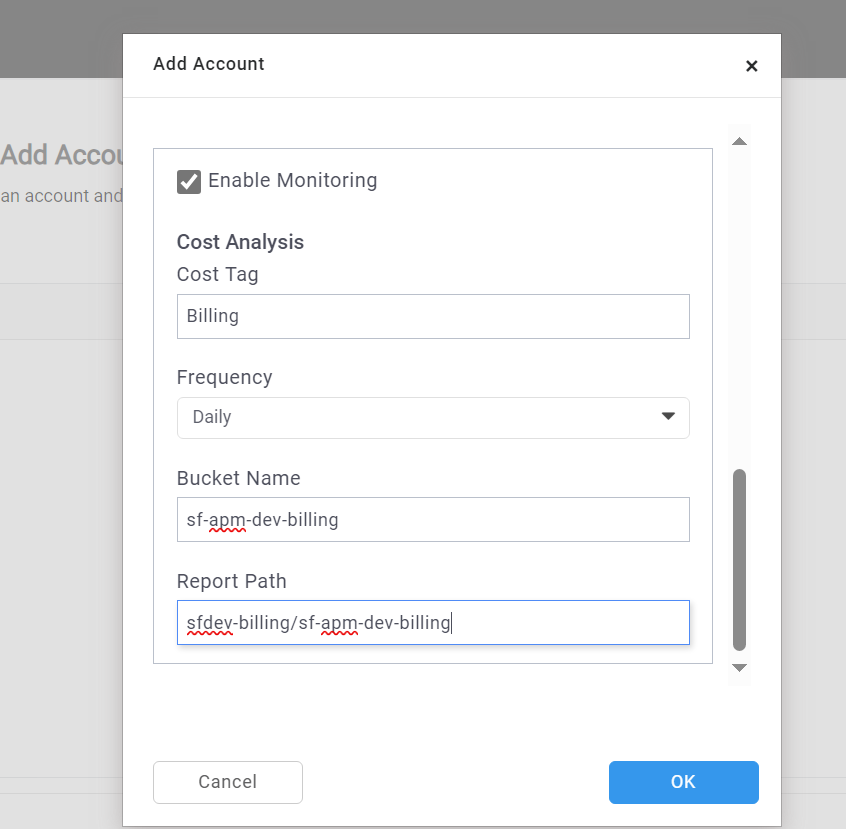
Select the
Okbutton to save the account.For Account type - Azure, add the following details:
- Account Name
- Profile
- Access Type
- Client Secret
- Client ID
- Tenant ID
- Subscription ID
- Location
- Resource Group
- VNET
Select the cloud account and click the
Nextbutton.
Choose Project
In the Choose Project section, do the following to link a project and application to the cloud account.
In the Projects tab, select an existing project or create a new project by selecting
+ Add Projectbutton.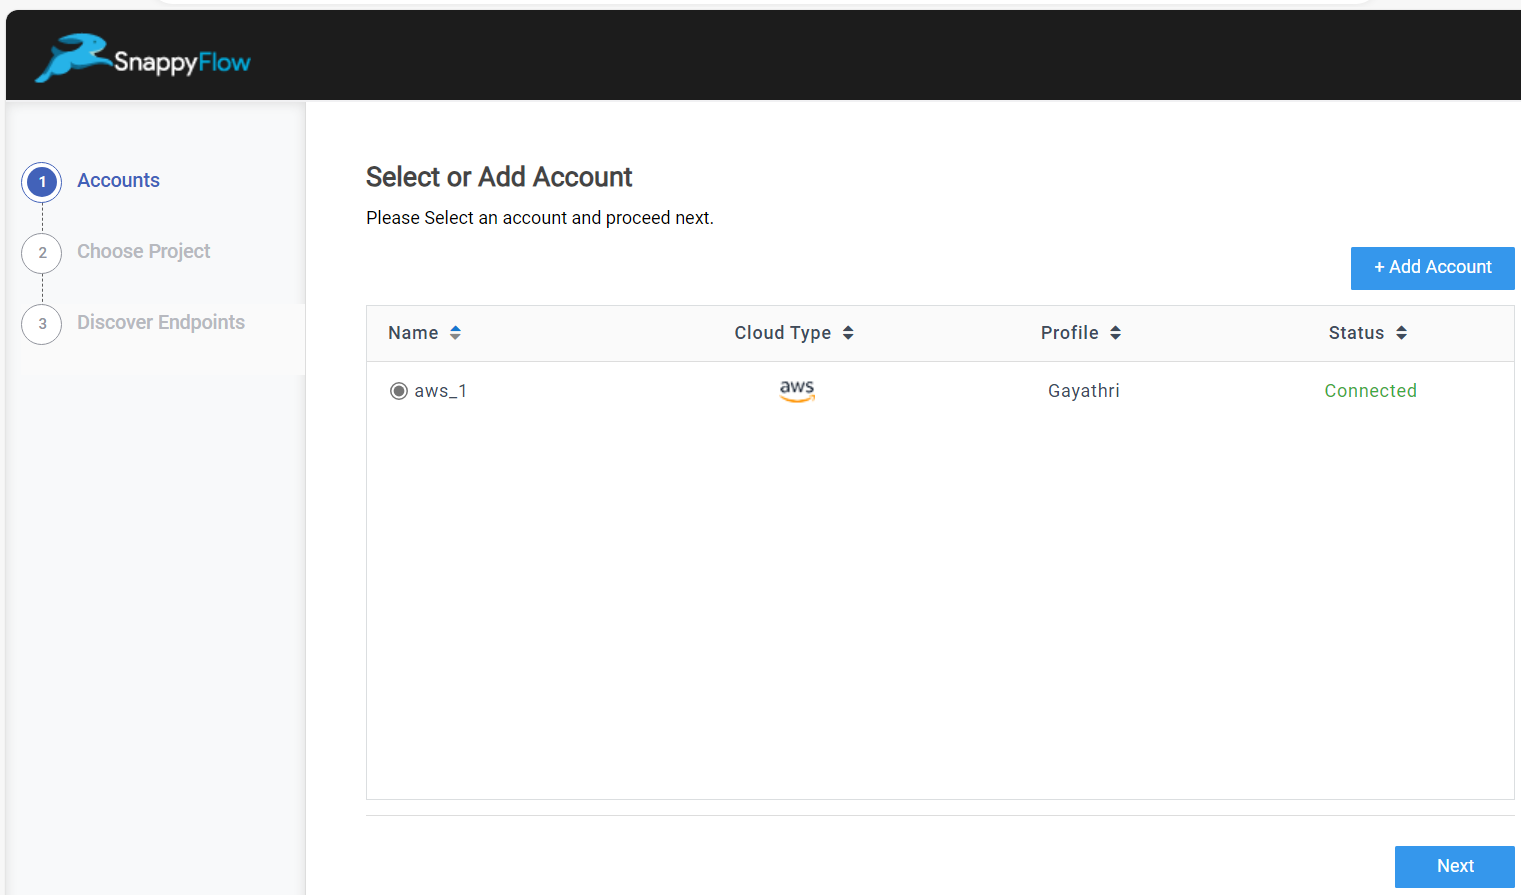
In the Application tab, select an existing application or create a new application by selecting
+ Add Applicationbutton.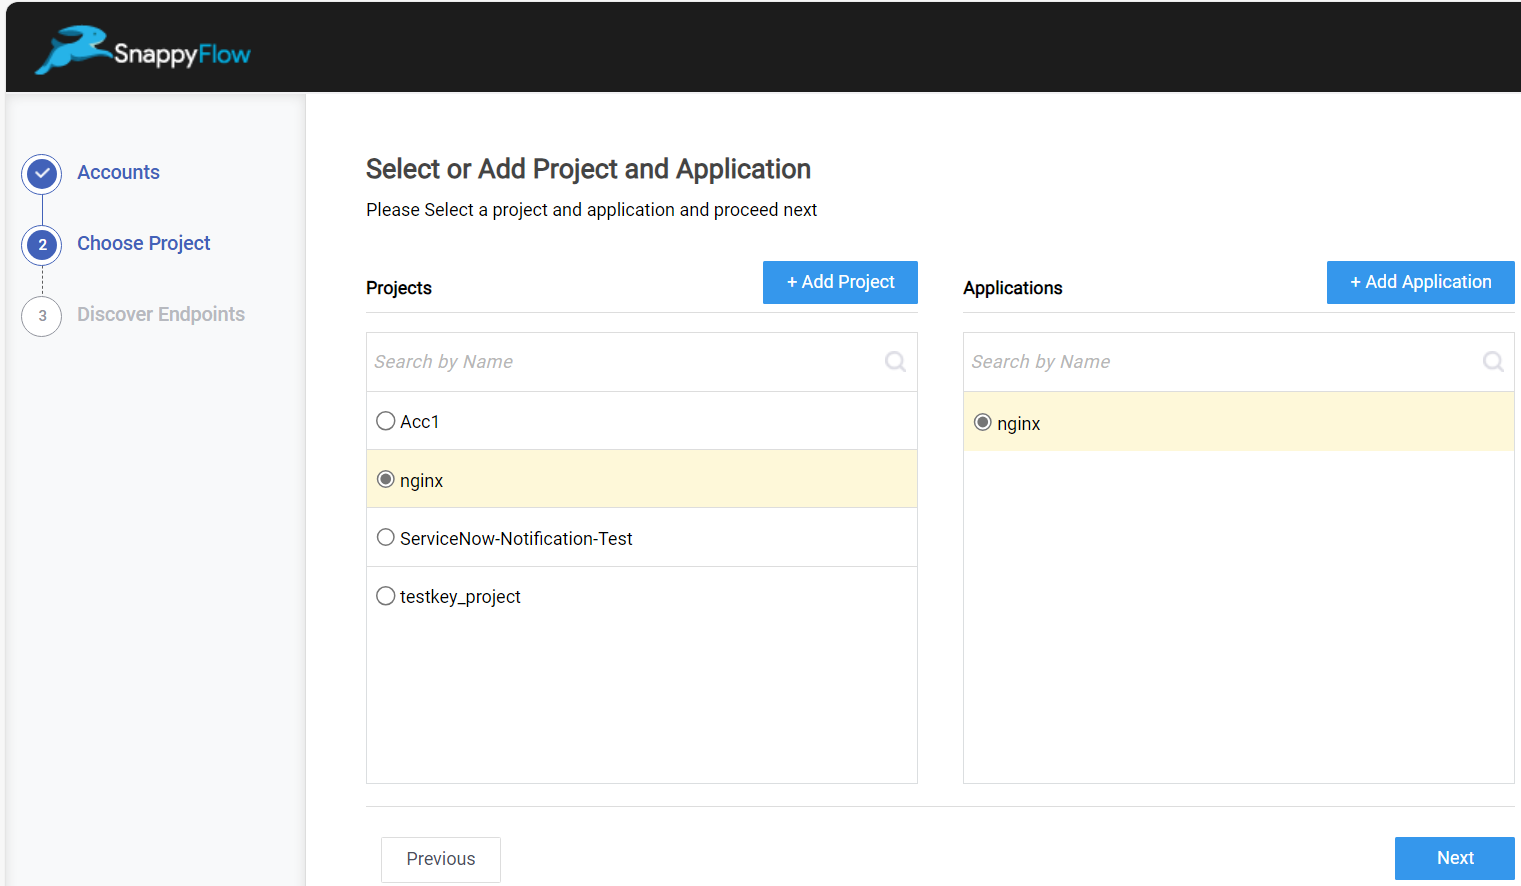
Select the
Nextbutton.
Discover Endpoints
In the Discover Endpoints section, do the following steps to add an endpoint.
Click the drop-down of
servicesand select a service.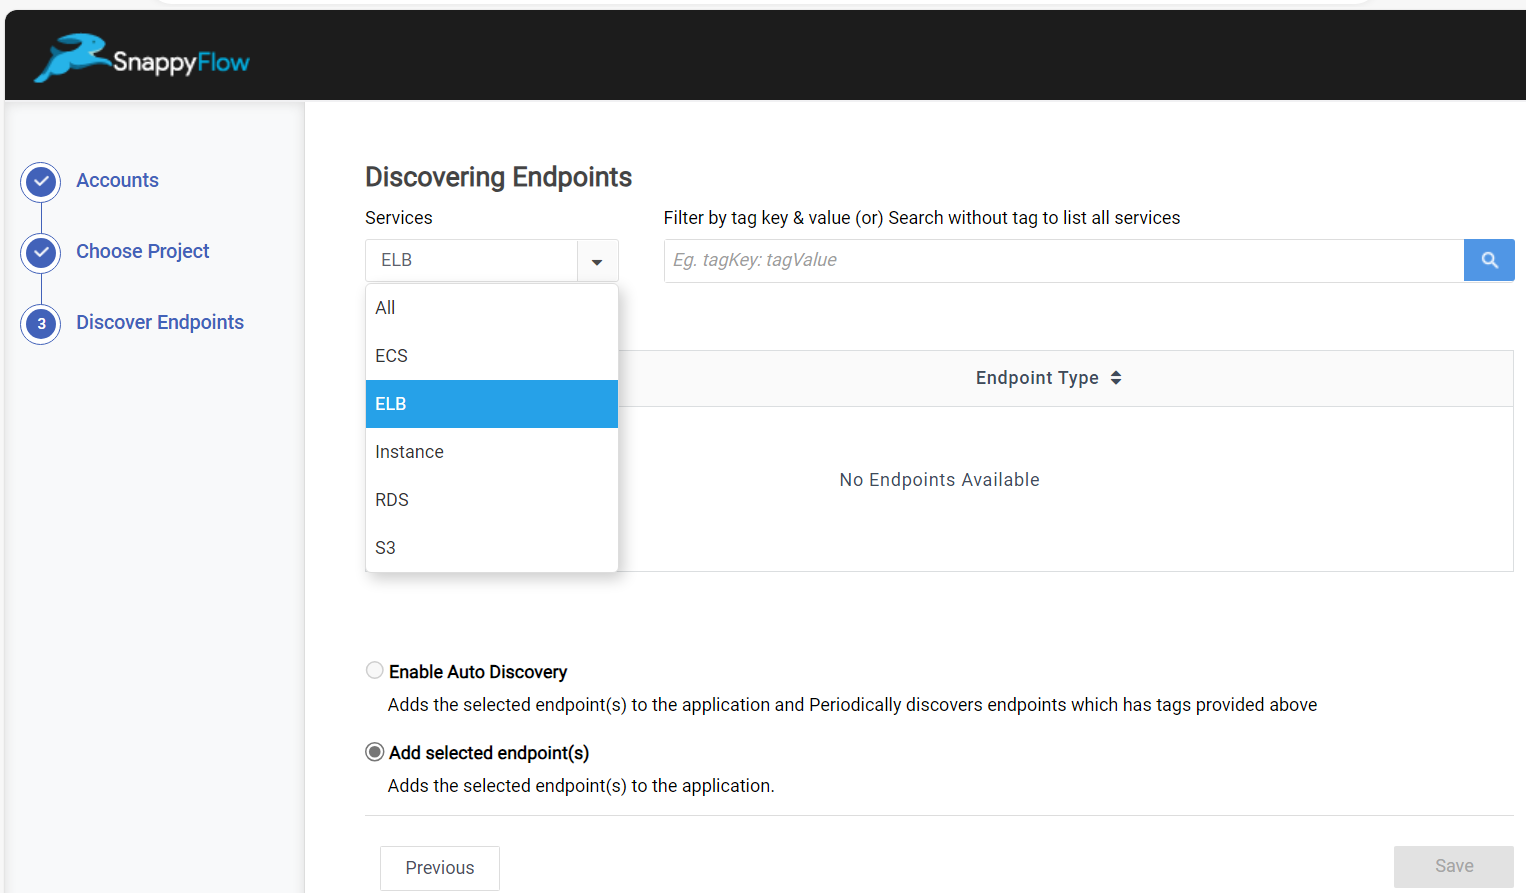
Add the Tag name and key value in the below format and click the search icon.
Tag:Key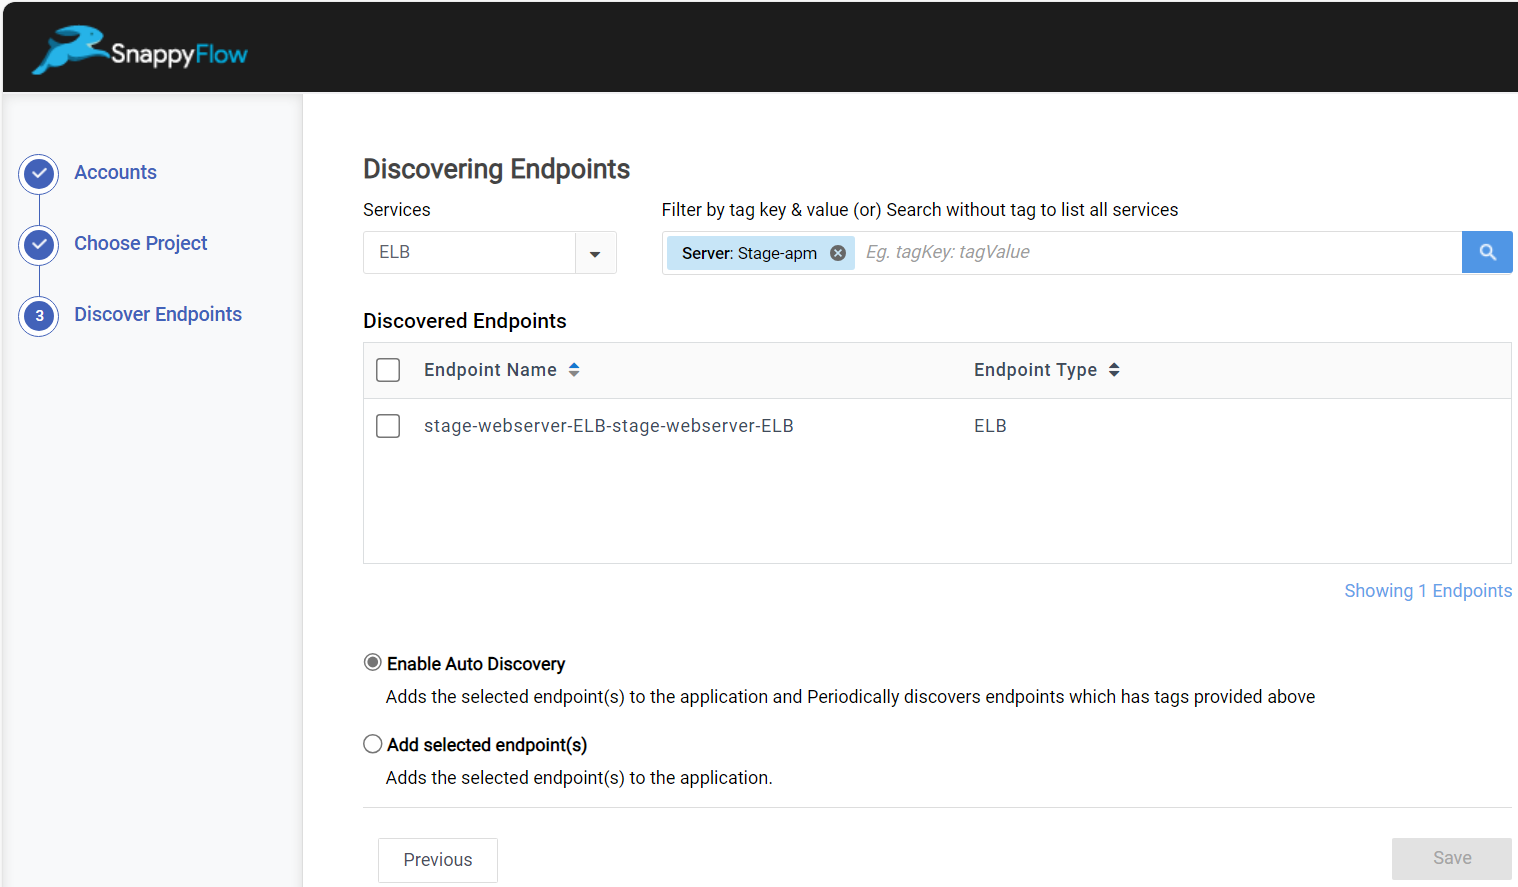
Check the checkbox of the endpoint.
Select the
Add selected endpoint(s)option.Click the
Savebutton to save the endpoint.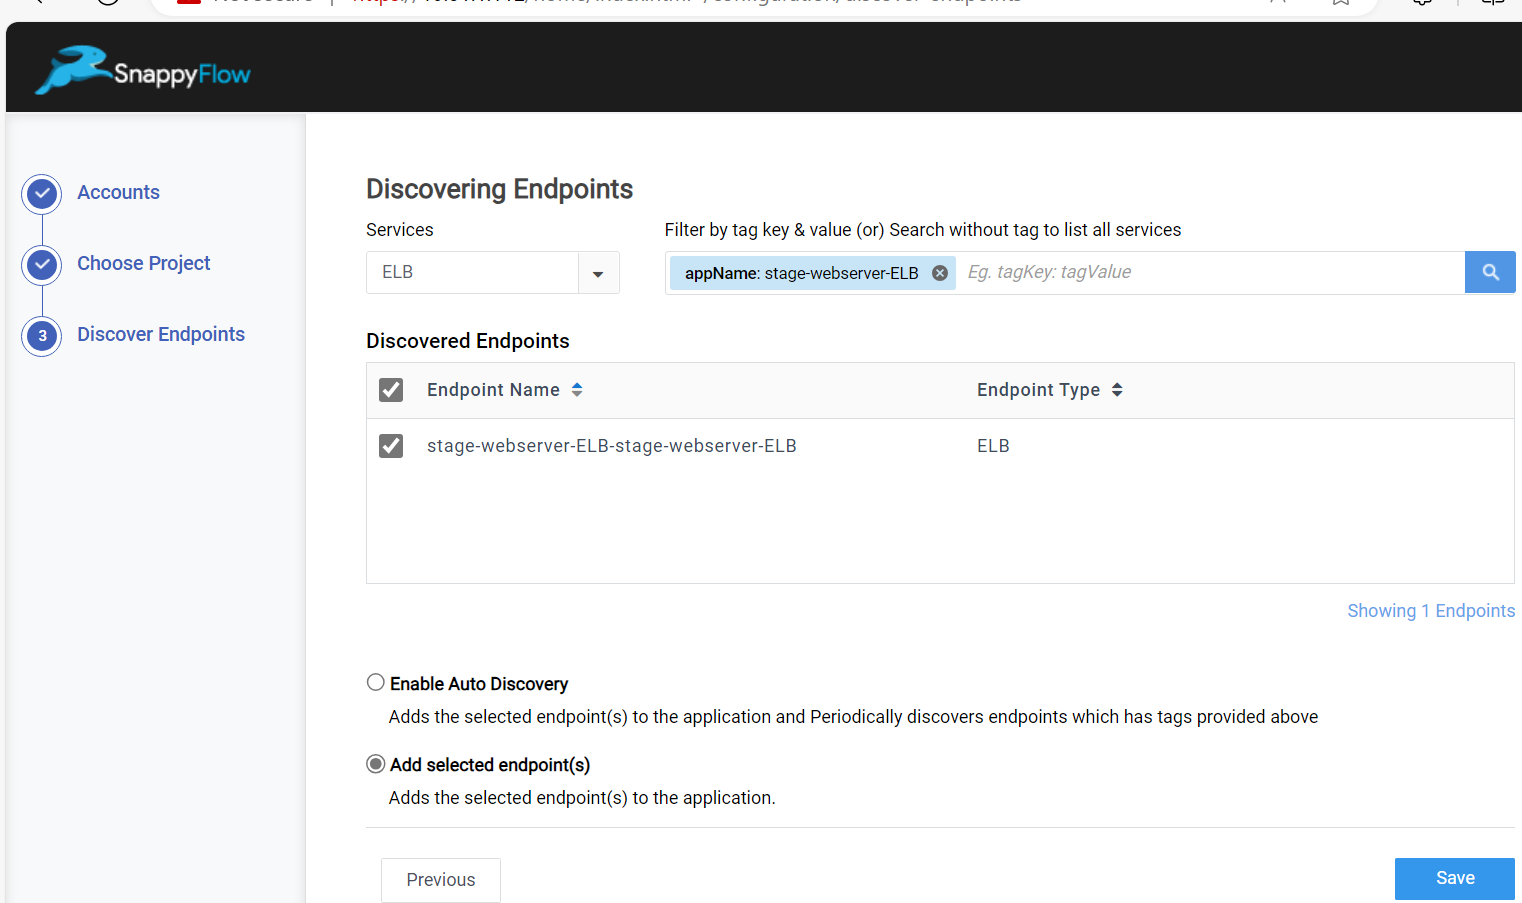
Once the endpoint is added, the metrics will refelect in the dashboard of the particular application.