Snappyflow Documentation
Welcome to Snappyflow's documentation website repository. The documentation website is generated via a modern static site generator tool Docusaurus. It takes .md (markdown) files and combines them to generate static HTML files which when uploaded to a hosted web server acts like a website. Docusaurus has been used by popular names such as React, React Native, Jest, Apache, React Navigation, Single SPA, SpotifyAPI-NET, Flux, etc.
Read on to learn how you can contribute your own content to SnappyFlow documentation website.
How it works
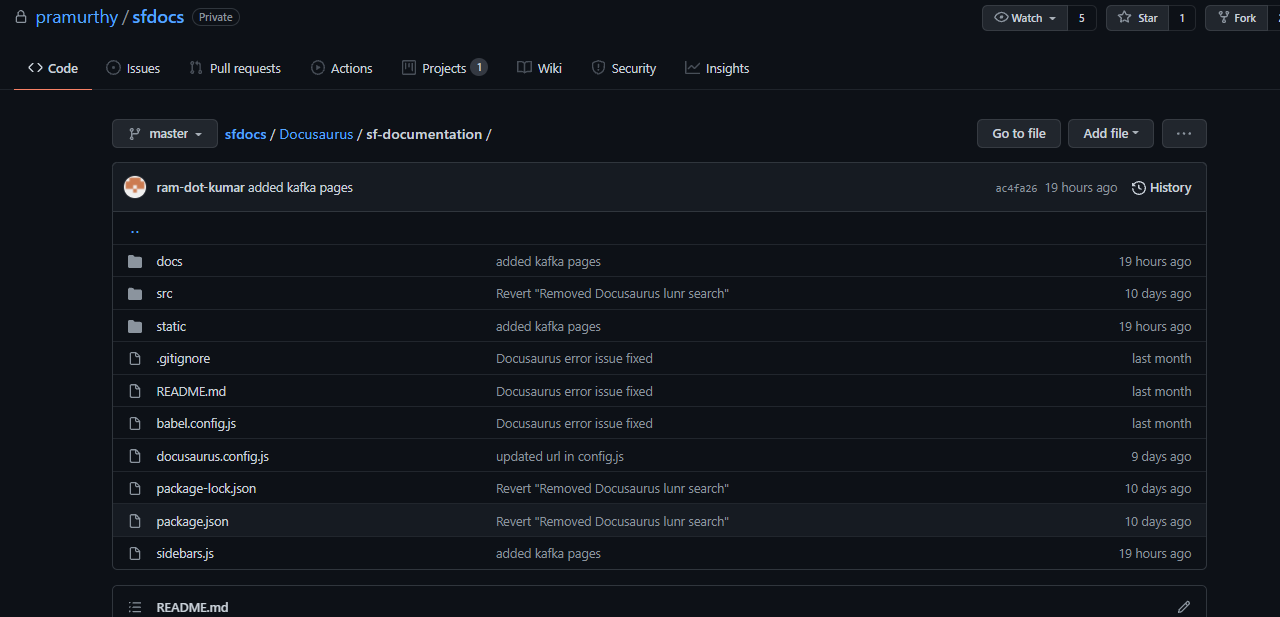
The main repo is located at https://github.com/pramurthy/sfdocs.

However, the actual project directory is present inside sfdocs/Docusaurus/sf-documentation/ which represents the Docusaurus project generating the website. Mentioned below are some important directories which you will be interacting with frequently to render your changes.
After running this project, the main page as per current stage will look as show below:

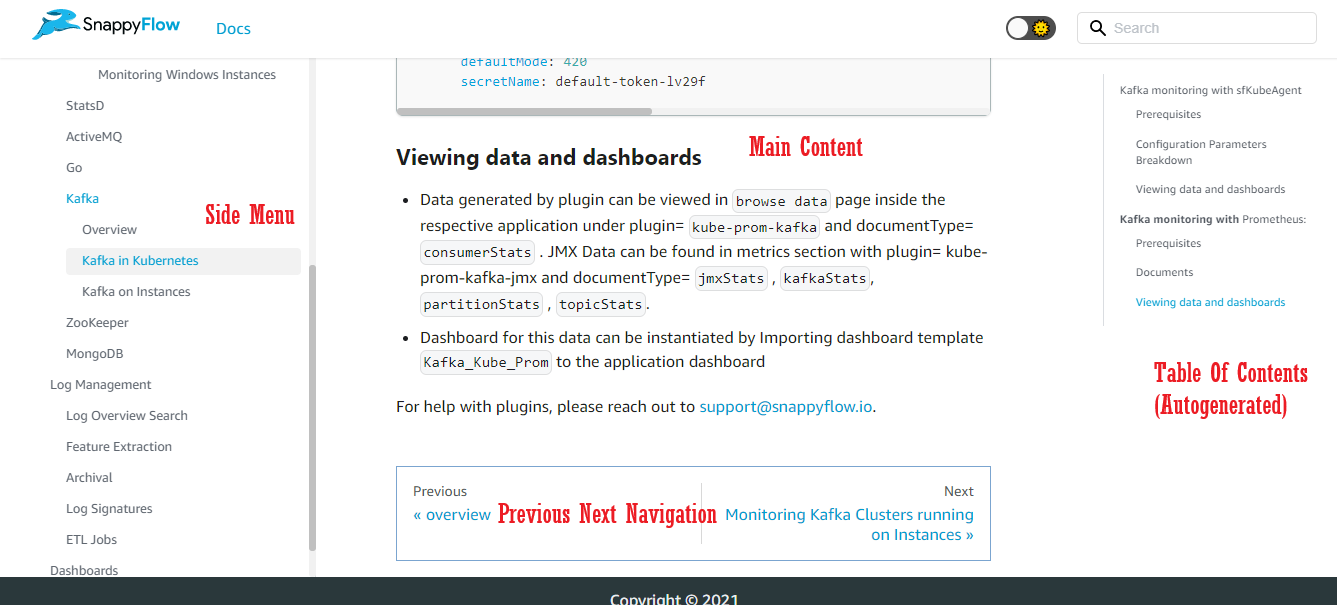
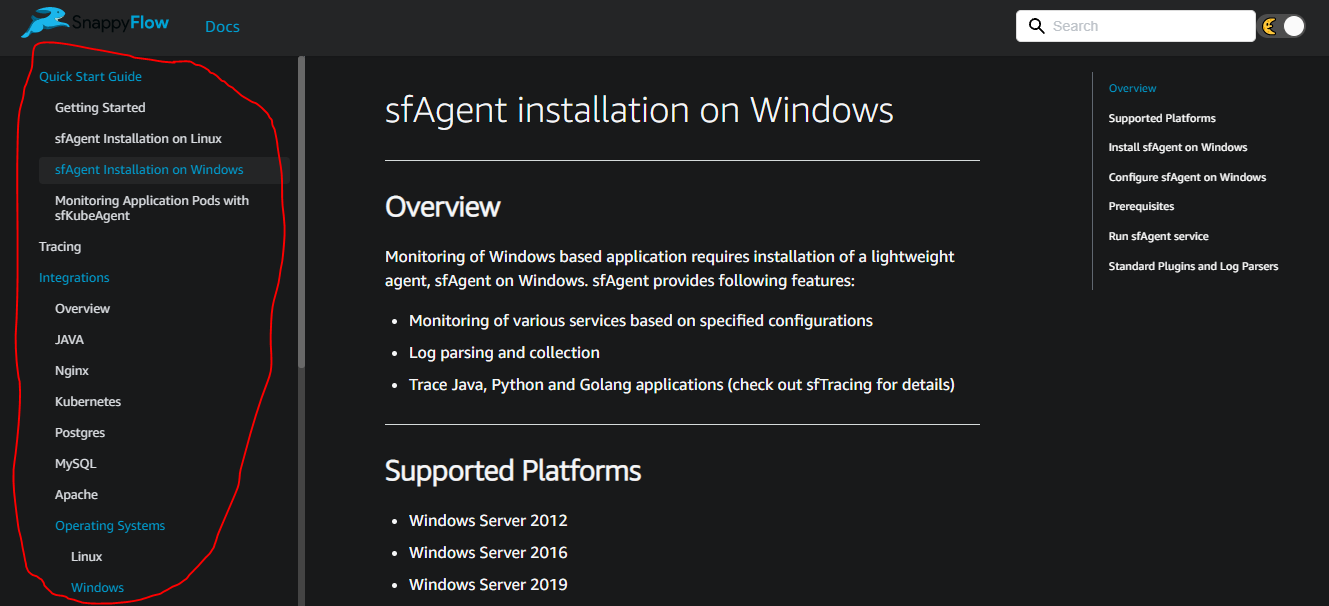
And after navigating to any given page, a common layout will be followed displaying sidebar menu, main content, table of contents, navigation buttons, etc. as shown below:
docs
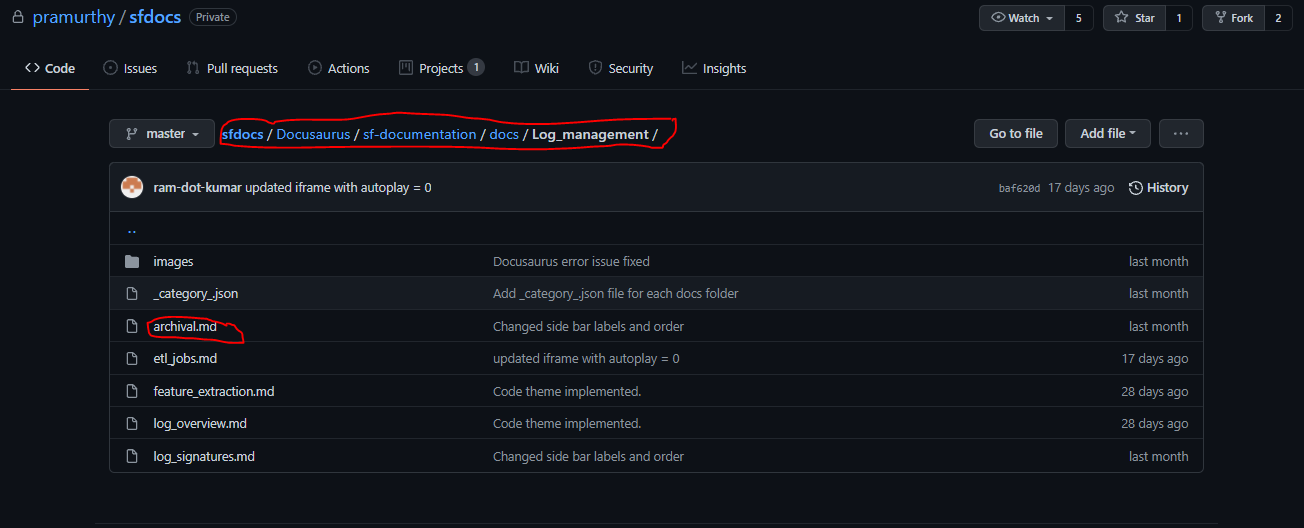
The /docs directory is the primary location where you will be placing all your markdown files. For categorizing your files based on topics and subtopics, you can create corresponding directories and place the actual markdown files inside. For example, if you want to display documentation for Archival subtopic under Log_management as main topic, then you will have to create a Log_Management folder inside /docs and then place archival.md inside that folder. After building the project, the Archival documentation content will be available at https://yourdocumentation.com/docs/Log_Management/archival.md.
Similarly, based on the directory structure created and files placed at their respective locations, you can create a collection of webpages consisting of all main topics and subtopics.
src
The src folder serves the basis of the project index representing the start/frontpage of the website. It contains primarily three subfolders - components,css,pages.
components:- You can use all your pre-existing or newly created custom React components by importing them from this directory. There already exists HomepageFeatures.js which will be responsible for rendering the main/landing page of the website. You can customize the existing components according to your requirements. Also existing, HomepageFeatures.module.css represent the CSS design styles being used in the HomepageFeatures.js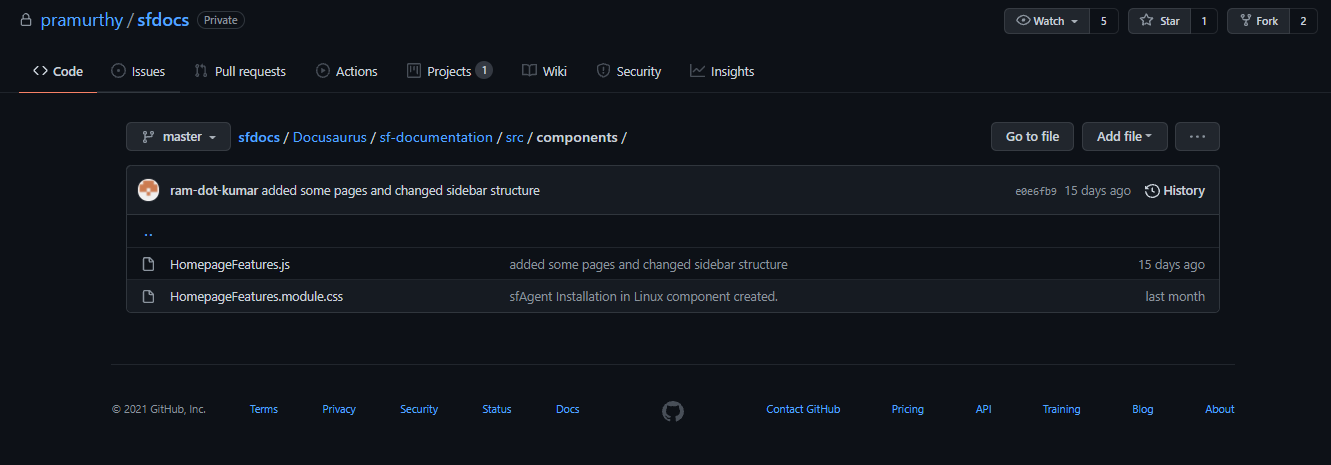
css:- This directory contains the custom.css file which represents the global CSS styling file which can be used across the whole project. If you don't require to create separate CSS files fr various components, you can just directly add the respective styles tocustom.cssand respective styling can will be rendered. Also you can just directly make changes to global tags for giving them a thematic look across the whole project.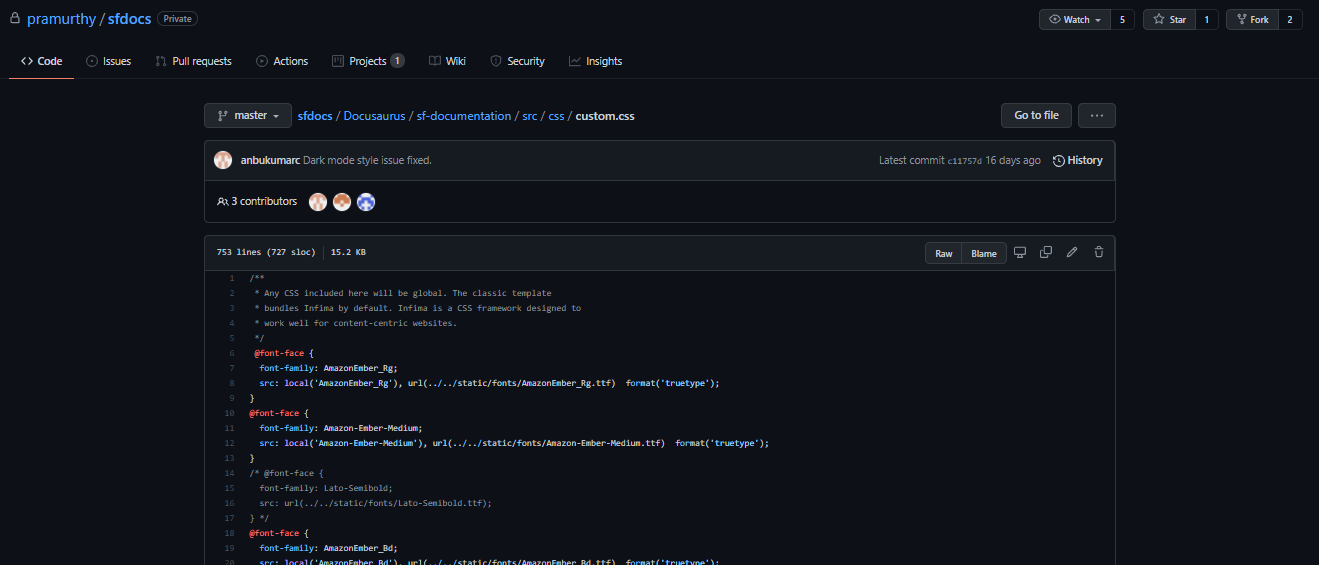
pages:- This is useful for creating one-off standalone pages like a showcase page, playground page or support page. The functionality of pages is powered by @docusaurus/plugin-content-pages. You can use React components, or Markdown. React Component files or Markdown files placed inside the/pagesdirectory will be directly available athttps://yourdocumentation.com/new_page.jsorhttps://yourdocumentation.com/new_page.mdrespectively.
static
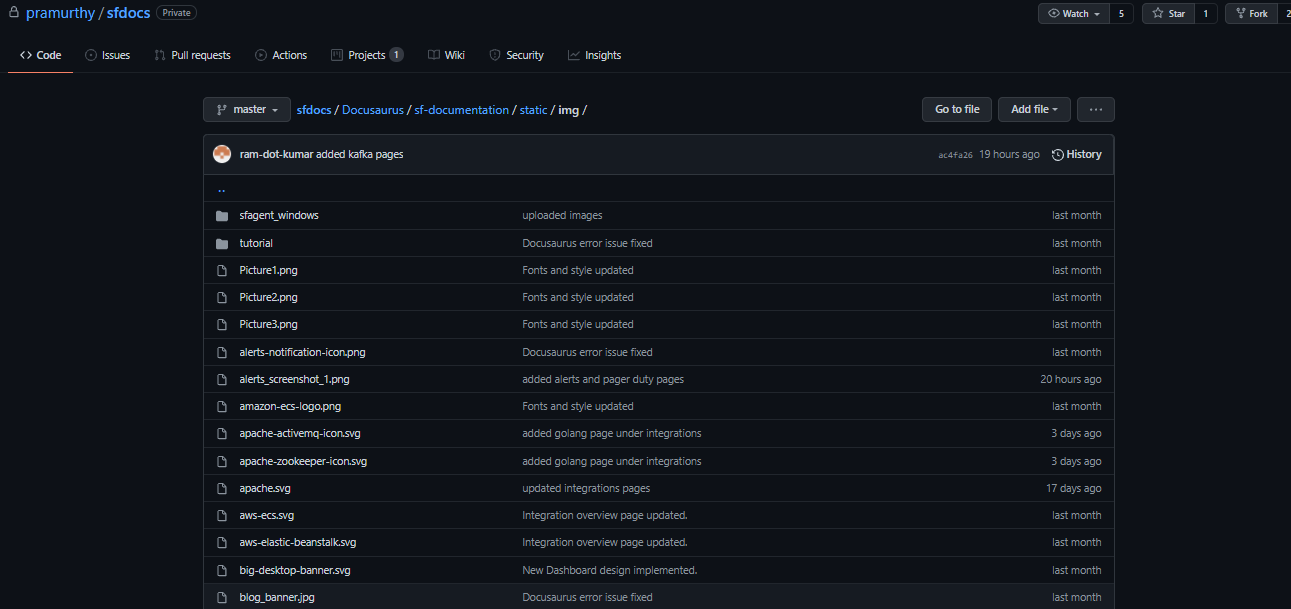
This folder is primarily responsible for storing all your external assets/resources such as images, SVGs, fonts, etc. All the images to be used accross the project can be placed inside /static/img directory and corresponding relative path /img/your_directory_here/sample_image.png.
For example, if you want to use Java_instance_logo.png in the Java_Instances.md file, you can place the PNG image at /static/img/Java/Java_instance_logo.png and use it inside the Java_Instances.md as <img src="/img/Java/Java_instance_logo.png" alt="Java_instances" />.
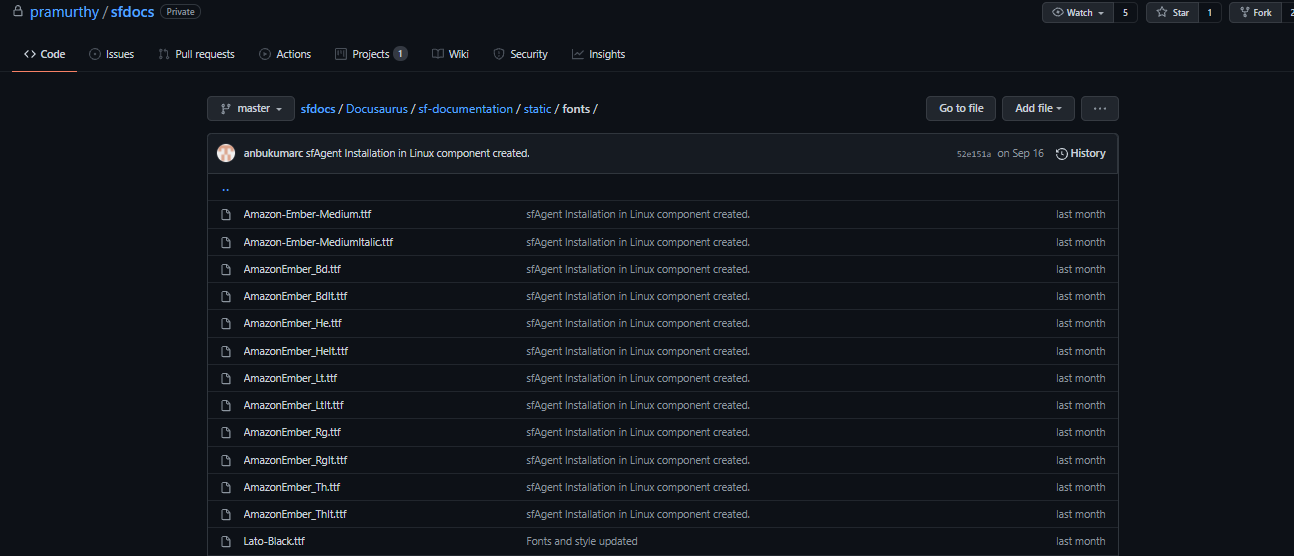
Also for using custom fonts, you can place them inside the static/fonts/folder.
docusaurus.config.js
The docusaurus.config.js is the main config file used for setting global configuration object for the whole project responsible for the way website is implemented. Config fields such as title, url, baseUrl, organizationName, projectName described in the file are mostly self-explanatory and can be changed accordingly based on client requirements.
How to contribute
We welcome users to contribute to our documentation. Go through the below instructions so that there are no build errors and everyone gets to see the desired content inserted at the desired place. After going through all the instructions, you can follow the below steps to add your contribution to the documentation:
- Login to your Github account
- Visit the Snappyflow documentation repository at https://github.com/pramurthy/sfdocs
- Create a fork of the mentioned repo by clicking at the top right section of the page
- This will create a repo under your Github account with all the branches, commits and changes present inside SF docs repo.
- Now for making changes inside the repo, you need to clone the repo to your local machine.
- Clone the project repository with your forked GIT URL
- Follow the below steps to ensure everything is running
- Open a command line/powershell/terminal, go to the cloned project directory.
- Navigate to Docusaurus/sf-documentation directory.
- For running this project on local machine, first install the required packages via
npm installoryarn install - After installing the packages, simply run the command
npm startoryarn start. This will open up a browser with the site running on the local machine. Typically it will behttp://localhost:3000/ - Make required content changes (see detailed instructions below). As you make changes and save the content, you will be able to see the results updated live on the browser.
- To ensure whether the build files for deployment are getting generated successfully, run
npm build.
After learning how to test your changes via trying out above steps, follow the below steps to create a pull request.
Create a new branch using the below command:
git checkout -b new_branchCreate a new remote for the upstream repo with the command:
git remote add upstream https://github.com/pramurthy/sfdocsNOTE: In this case, the "upstream repo" refers to the original SF Docs repo you created your fork from.
Now you can make your changes in the new branch and implement the below commands to create a pull request.
  git add .
  git commit -S -m 'Commit Description for pull request'
  git push -u origin new_branch
Now, your changes are published to your fork of the repo. Visit your fork repo where a Compare & pull request button will appear in GitHub. Clicking on it will navigate you to a new screen. Open a pull request by clicking the Create pull request button. Once your pull request is created, it will be reviewed by our team. If everything looks good, we will approve the pull request and your changes will be integrated accordingly. For issues or pull request reviews, you can contact below personnel:
Swastik Singh https://github.com/Swastik-dot-Singh
Ram Kumar OSP https://github.com/ram-dot-kumar
Anbukumar C https://github.com/anbukumarc
How do I edit/add new pages to SF documentation site
Its very easy to make changes in Docusaurus projects. Whether you want to make a small change in an existing file, or you want to add a new pages, Docusaurus provides an efficient way for contributors to make the desired changes. Let's go through them one by one.
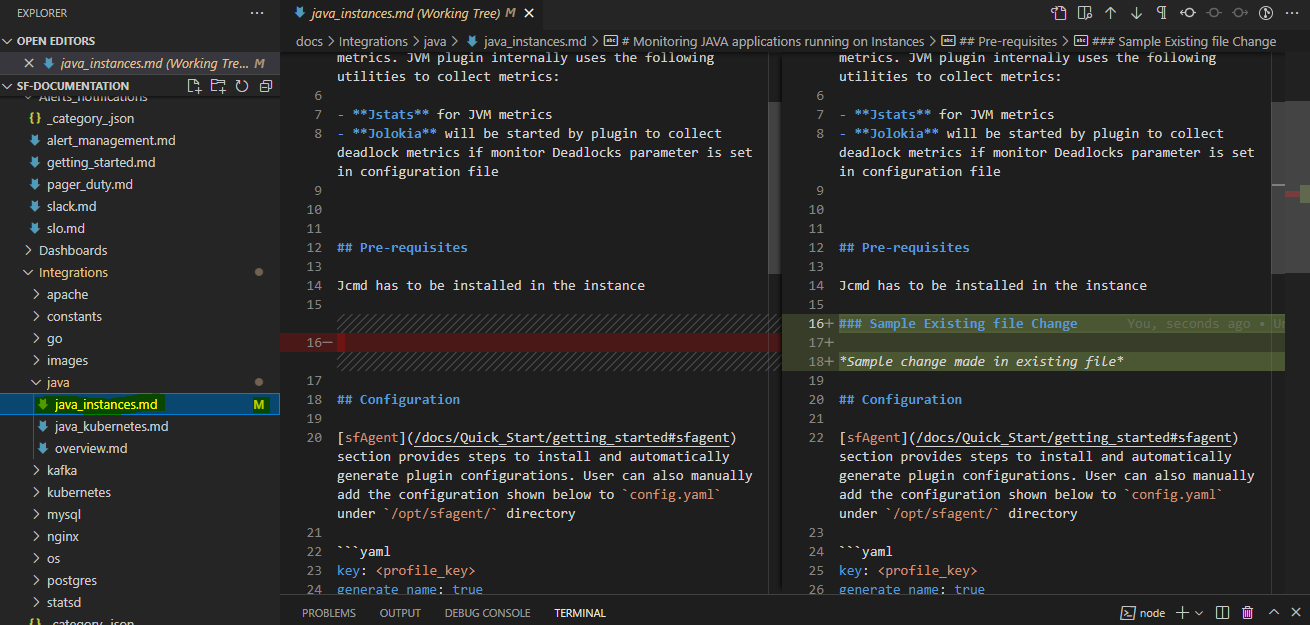
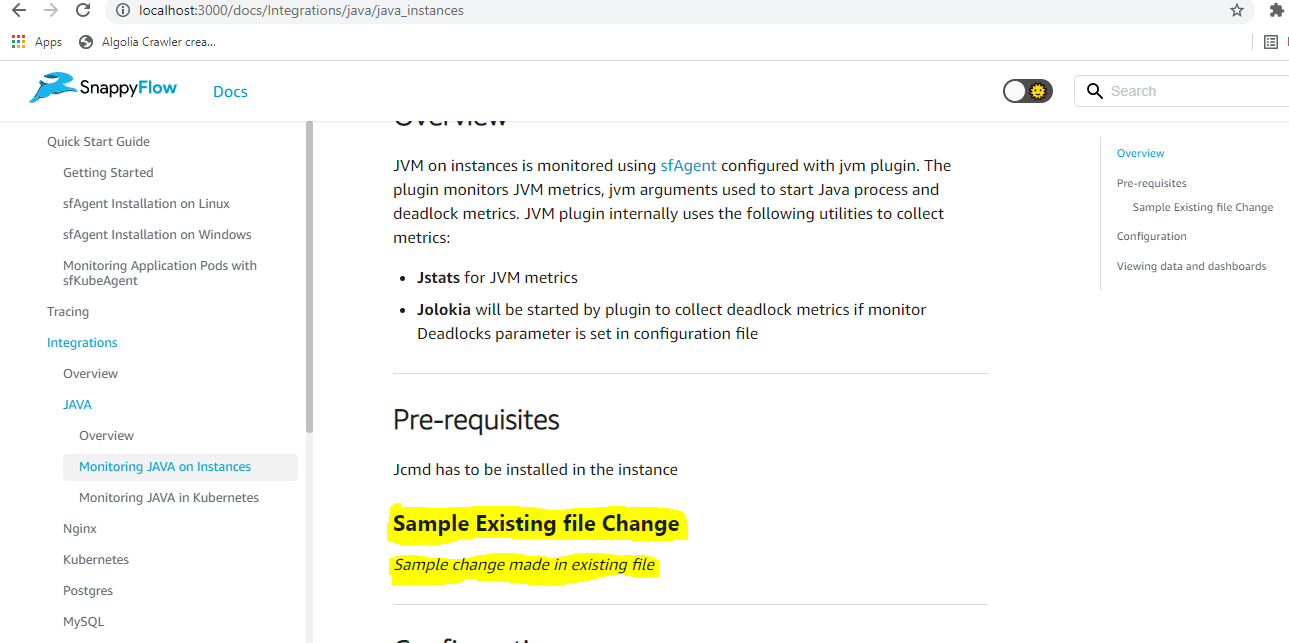
Changes to existing pages
All the content files constituting the website will be placed under docs/ directory of the project in .md format.
For example, if you made a change in docs/Integrations/java/java_instances.md, you will be able to see the effects at
http://yourdomainname.com/docs/Integrations/java/java_instances
Editing .md files with Typora
There are many online/offline tools to edit .md files.
We suggest using Typora. Typora gives you a seamless experience as both a reader and a writer. It removes the preview window, mode switcher, syntax symbols of markdown source code, and all other unnecessary distractions.
It is easy to use with a no-code interface and live editing
easily edit content heavy pages
WYSIWYG - what you see is what you get feature.
Shortcuts to make editing easy
Ctrl+1generates h1 header,Ctrl+2generates h2 header,Ctrl+3generates h3 headers and so on.ctrl+shift+kcreates a code blockctrl+shift+[ creates numbered listsctrl+shift+]creates bulleted lists- More on, double backticks "``" generates format for a code block.
It can display various items such as tables, ordered/unordered lists, mathematical formulae, images, diagrams, inline styles, etc.
Adding images
If you want to add images to the existing content, you can use the <img> HTML tag anywhere between the markdown content. Since Docusuaurus parses MDX content, you can use HTML content in between and site will be generated accordingly. For the image source URL, you first need to place the image inside the project directory and then use the relative path with the src attribute. All the images should be placed inside the /static/img directory. And then use src="img/imageToBeUsed.png" in the <img> tag.
For example, if you want to use logo.png in docs/Integrations/archival.md, first you need to place the image in static/img/ directory. And then place the <img> tag at the desired place.
    ----------------------
    ----------------------
    <img src="/img/logo.png" />
    ----------------------
    ----------------------
For brands and logos, we suggest using SVG file format. Place the SVG file inside the same directory as images. And then use <img src="/img/logo.svg" />. However, for using the correct SVGs, you need to contact below personnel.
- Pravinsinh Jadeja Pravinsinh.Jadeja@Maplelabs.Com
Adding product screenshots - Important
- do not resize the image
- make sure there is no confidential information
- remove any client references
Adding videos
For displaying a video between the content, you can similarly use the <iframe> tag. Upload videos to SnappyFlow's official YouTube video channel and use the embed URL provided by YouTube.
For creating and uploading videos, get in touch with
- OSP Ram Kumar - ram.osp@maplelabs.com
Example
If you want to display https://www.youtube.com/embed/9CvPvMd3udk?rel=0 video in between the markdown file docs/Integrations/archival.md, you can place it the following way:
---------------
---------------
---------------
<iframe title="Automatic discovery & configuration" width="570" height="321"
src="https://www.youtube.com/embed/9CvPvMd3udk?rel=0" frameBorder="0" allowFullScreen="allowFullScreen" mozallowfullscreen="mozallowfullscreen" msallowfullscreen="msallowfullscreen"></iframe>
---------------
---------------
---------------
Adding new pages
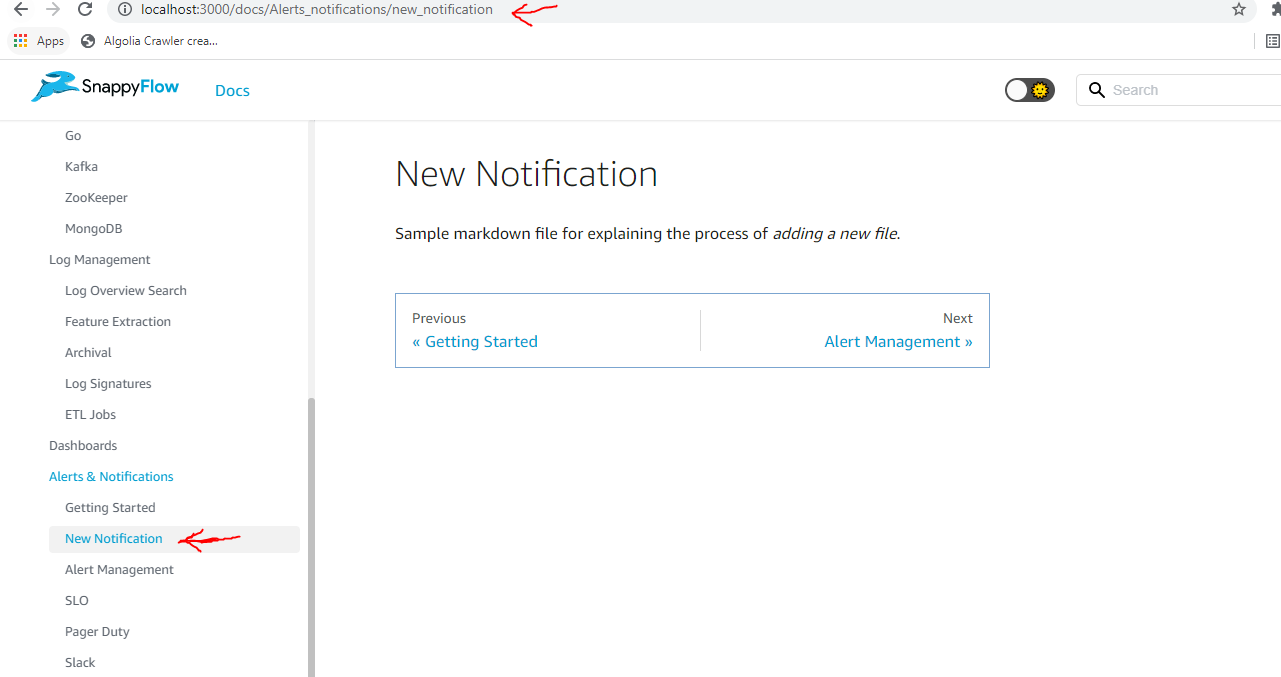
If you want to add documentation content file under a particular topic, you can create a new .md file and place it under the desired directory. For example, if you want to place a new file new_notification.md.md under Log_management topic, you can place the file inside docs/Log_management directory.
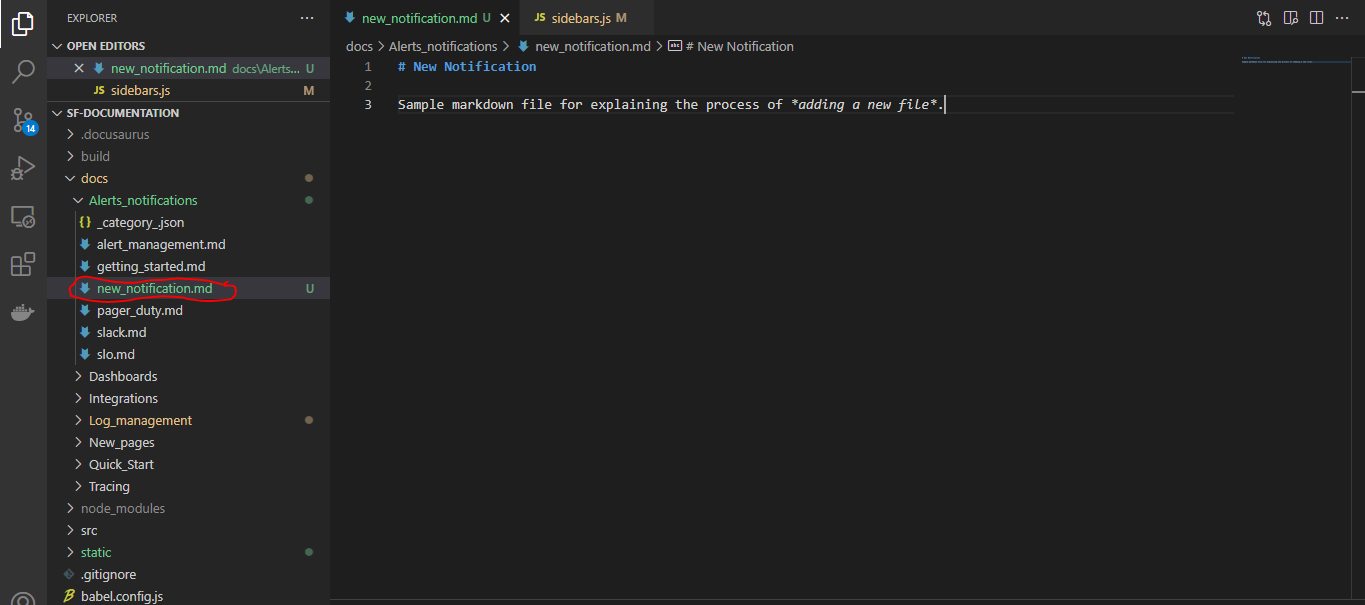
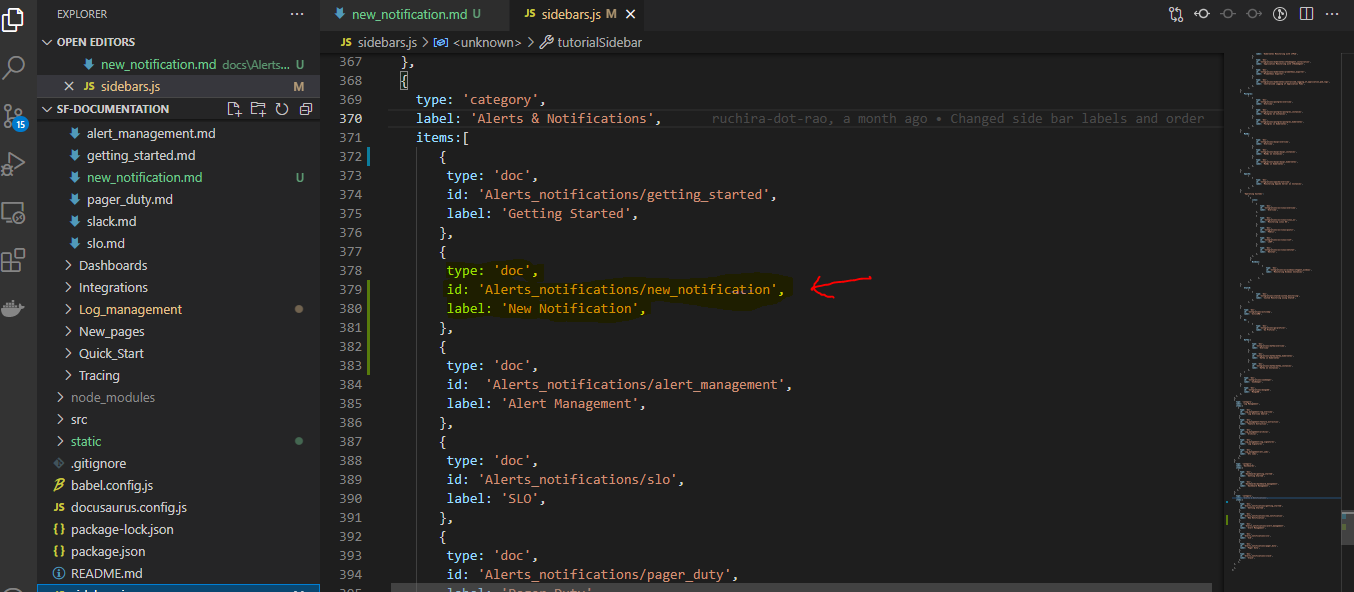
And subsequently, add its config in the sidebars.js file for accessing from the sidebar menu.
 Upon successful build, the desired content will be available at
 http://yourdomainname.com/docs/Log_management/new_notification
Editing/Re-ordering the Sidebar Menu
Based on the folder structure created inside docs/ directory, Docusaurus tool will also auto-generate a sidebar menu in the left hand side which helps users in navigating to their desired page/content. Also, it provides a paginated navigation, with next/previous button at the bottom of each page.
You have to create a separate sidebars.js file which will contain the JSON structure of the navigation to be displayed.
A sample sidebars.js file is displayed as below:
module.exports = {
  tutorialSidebar: [
    {
      type: 'category',
      label: 'Quick Start Guide',
      items: [
        {
         type: 'doc',
         id: 'Quick_Start/getting_started',
         label: 'Getting Started',
        },
        {
            type: 'doc',
            id: 'Integrations/os/linux/sfagent_linux',
            label: 'sfAgent Installation on Linux',
        },
        {
            type: 'doc',
            id: 'Integrations/os/windows/sfagent_windows',
            label: 'sfAgent Installation on Windows',
        },
        {
            type: 'doc',
            id: 'Integrations/kubernetes/sfkubeagent_installation',
            label: 'Monitoring Application Pods with sfKubeAgent',
        },

      ],
      collapsed: false,
    },
};
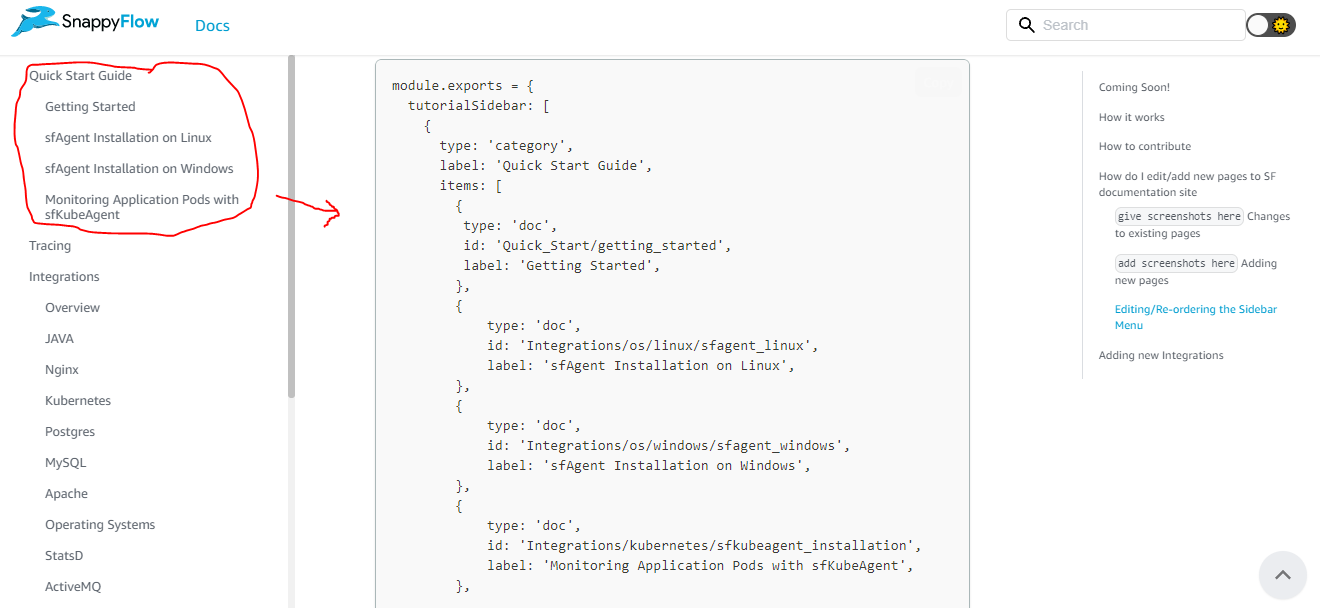
Table Of Contents
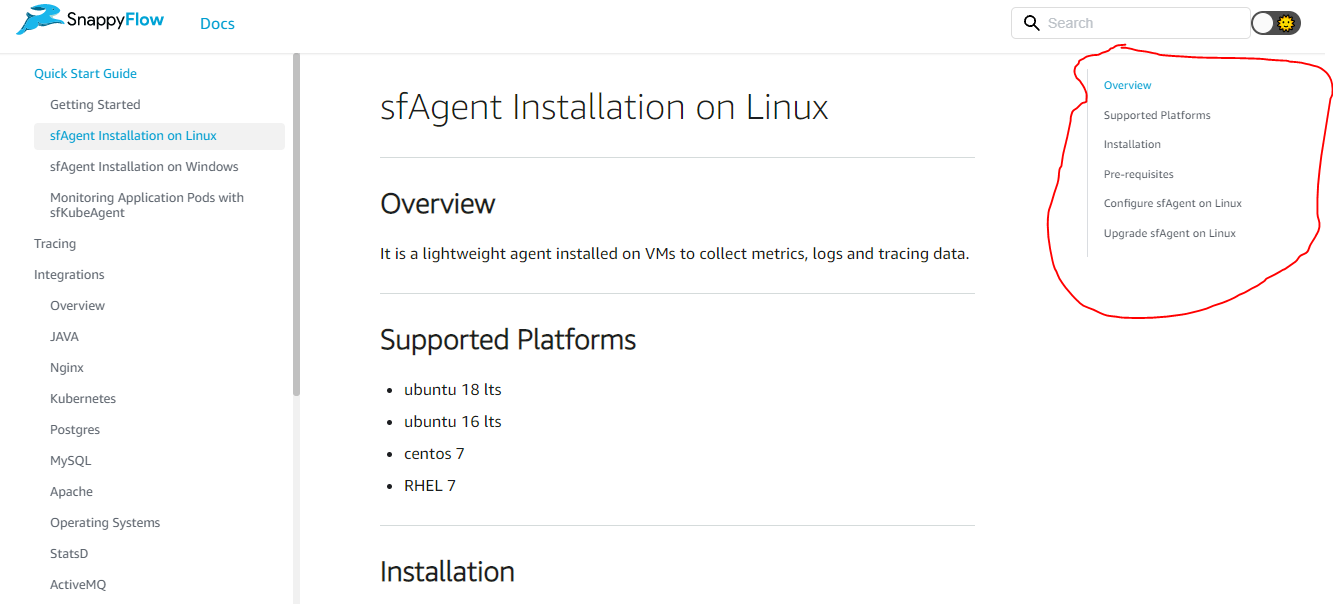
Docusaurus auto-generates a table of contents at right side of every page (refer below image). The table of contents is comprised of all the headings/headers which are of h2 (##) or h3 (###) levels.
Clicking on the header link will scroll to the corresponding topic section. Also, if you are scrolling through a particular section, the corresponding link will get highlighted. Table of Contents is very helpful if you want to skip right to read your desired part.
In order to generate correct hierarchy for Table of Contents, you have to write topics and subtopics in correct order.